
1. How to listing items as Merchant Fulfilled
2. How to do merchant fulfill after a sale
1. Steps to list items as Merchant Fulfilled (MF)
- Set TurboLister to MF mode: Click Menu (1) -> Settings (2), select Fulfillment Channel to Merchant Fulfill (3), click Save (4). TurboLister will restart in Merchant Fulfilled mode.

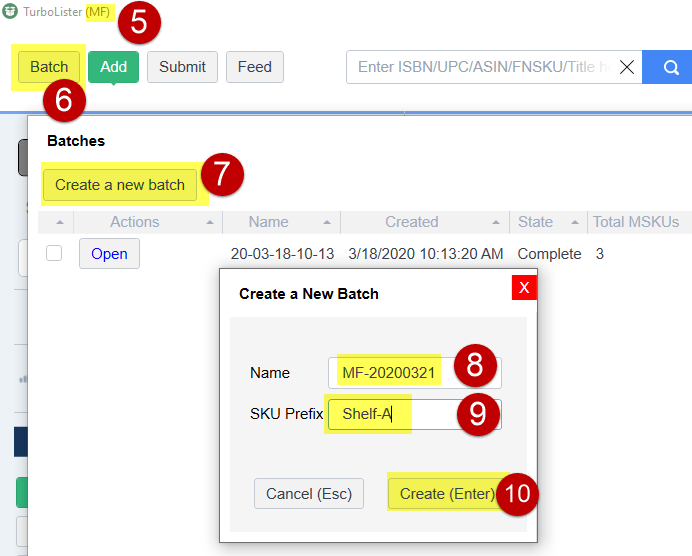
- Create a new MF batch: After TurboLister restarts, it will show it is in MF mode (5). Click Batch (6) button to go to the batch screen, and click Create a New Batch (7). Enter a batch name (8) and SKU prefix (9) for this batch. SKU prefix is used to indicate a shelf location in your MF system, ex. Shelf-A, which can mean one of your shelves that you mark as “A”. Click Create (10) to start to work on your batch.
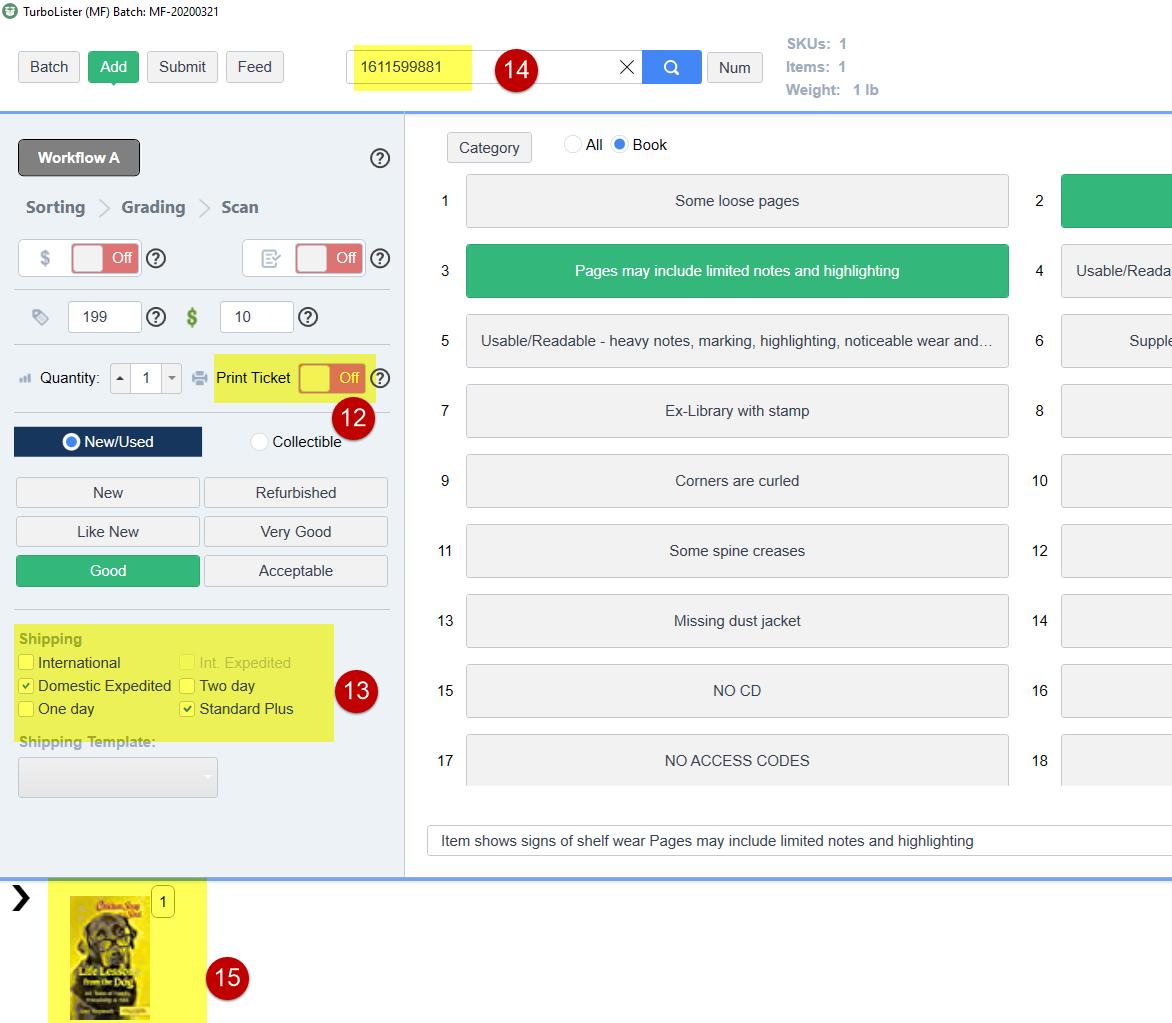
- Use SKU suffix (11) for your MF ticketing system. In order for you to find your sold books quickly, you need to have a good ticketing system. Amazon will include SKU on your order page. You use both the SKU prefix (indicates the shelf number), and the SKU suffix (indicates its location in that shelf), so you can locate the sold book. We recommend you use the TSP 700 II printer for your MF ticketing system. Another cheap alternative is to use a numbered ticket. You enter the first number (ex. 854) of the numbered ticket in your SKU suffix (11).

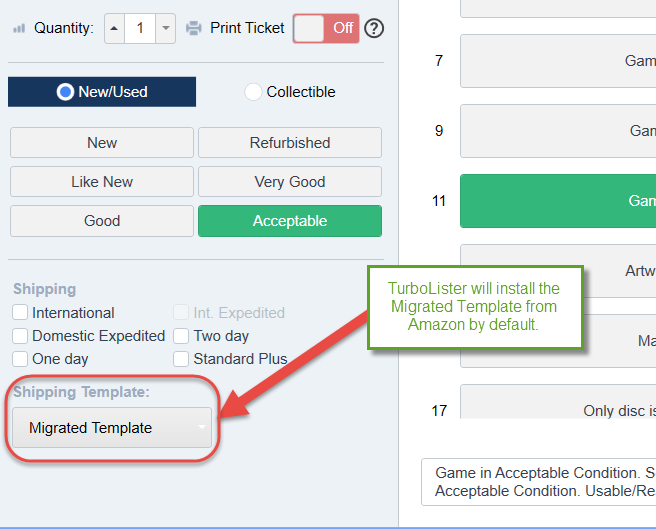
- You need to set up a shipping template. TurboLister will install the Migrated Template from Amazon by default. This will add a $3.99 shipping cost on top of your list price. You can also add your oen shipping template. Here is the topic show you how to set up your template and add it to the TurboLister.
- Now you can add an item. You can use any workflow as you do the FBA listing. If you do not have TSP 700 printer, and use the number ticket to do the ticketing, you need to turn off Print Ticket (12). Select your shipping options (13) carefully. As a start, I recommend you uncheck all those shipping options, so you just need to ship every book as Media Mail. Scan your item in (14) and it will appear on the bottom (15). Insert the MF ticket label or your number ticket inside the book. Now scan the next book.
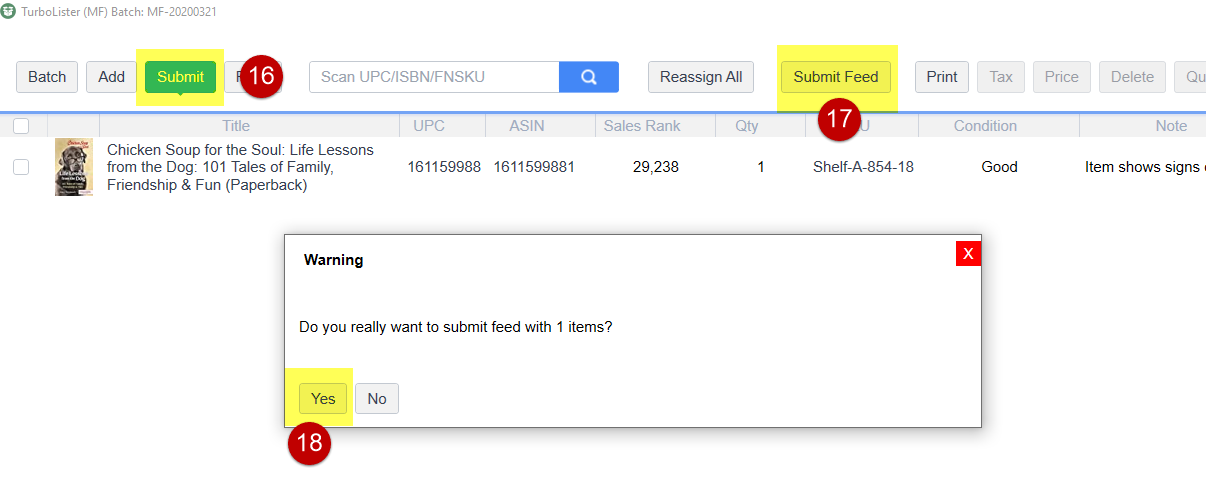
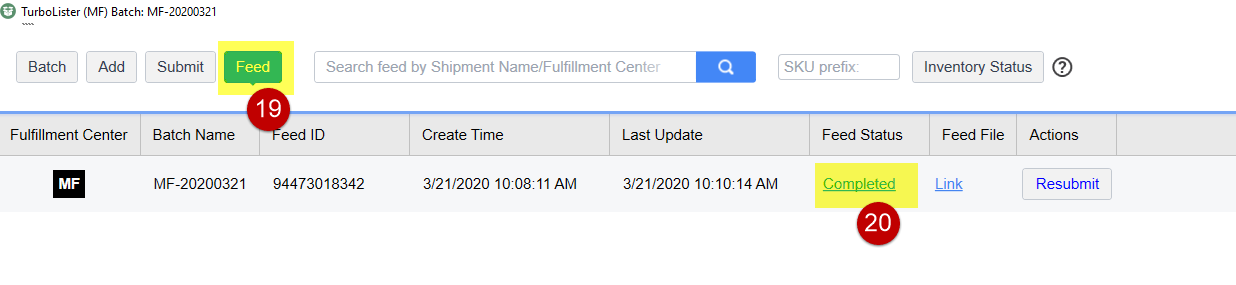
- Submit your feed. After you add all your items and place them into the shelf, you click Submit (16) to go to Submit screen, click Submit Feed (17). Click Yes (*18) on the pop-up screen. This will submit your MF listings to Amazon.
- Check your feed status. Click Feed (19) to go to the feed screen. When the Feed Status (20) of your feed is completed, your item is active on Amazon and ready to be bought by Amazon buyers.

2. Steps to fulfill your MF items after a sale.
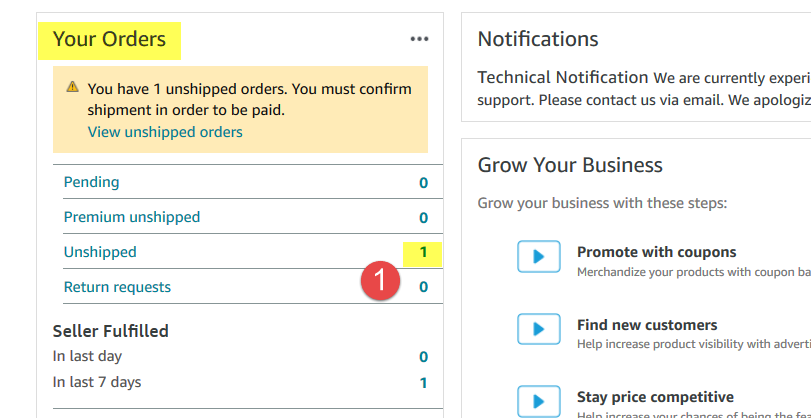
- Log in to your Amazon seller central site. Under “Your Orders”, you will find “Unshipped” orders number (1), click on it.
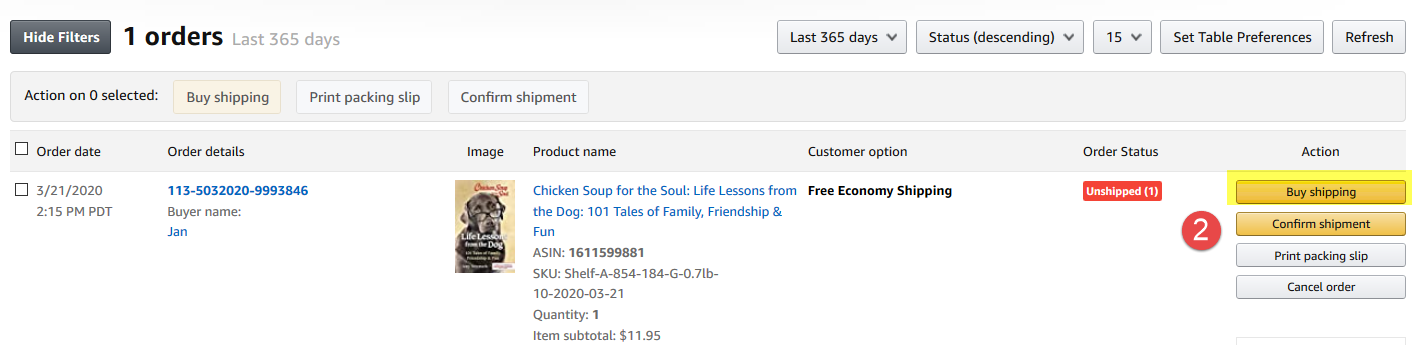
- Click “Buy shipping” button (2)
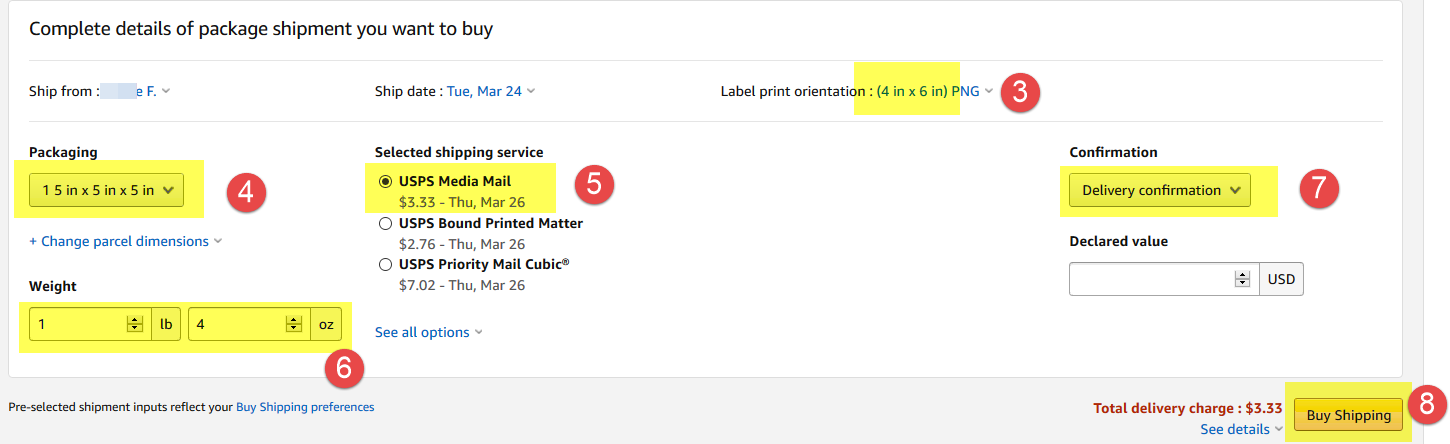
- If you use a 4×6 thermal printer, change label size to 4 × 6 (3). Enter your packaging dimension (4). If you use USPS media mail, you do not need to be super precise on this info. Select USPS Media Mail (5) or other appropriate shipping options. Use a digital scale to weigh your item (6). Delivery confirmation (7) is enough for most items. You can choose Signature confirmation if the item is expensive. Click on “Buy Shipping” (8)
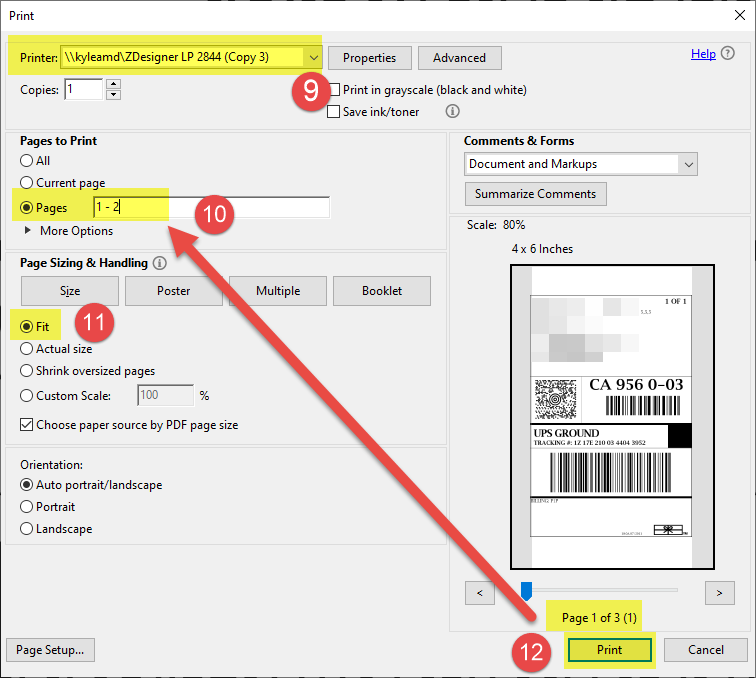
- When the label shows up, select the correct printer (9). We recommend a 4×6 thermal printer such as Zebra 450 or Rollo. If you print out multiple shipping labels, click on Pages (10) and select the page range from 1 to the 2nd to the last page. This is because the last page is the summary of your multiple labels’ purchase. Make sure you select Fit (11). Then you can click Print (12) to print out shipping label(s). The delivery confirmation number will be sent out to Amazon automatically. You just need to pack this book and drop inside a USPS blue box.
Feedback
Copyright © 2024 ASellerTool, Inc.
—
Powered by 
Post your comment on this topic.