
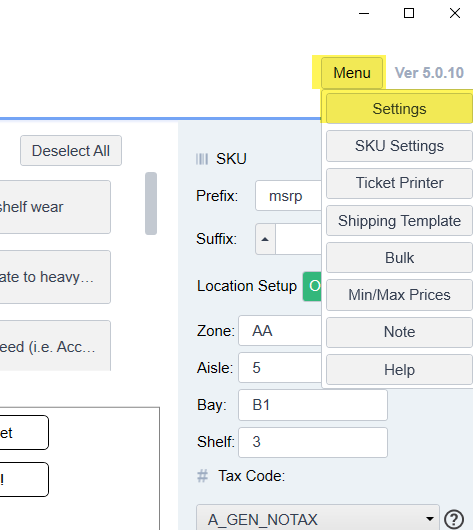
After the program starts, click Menu -> Settings to bring up the Settings screen.
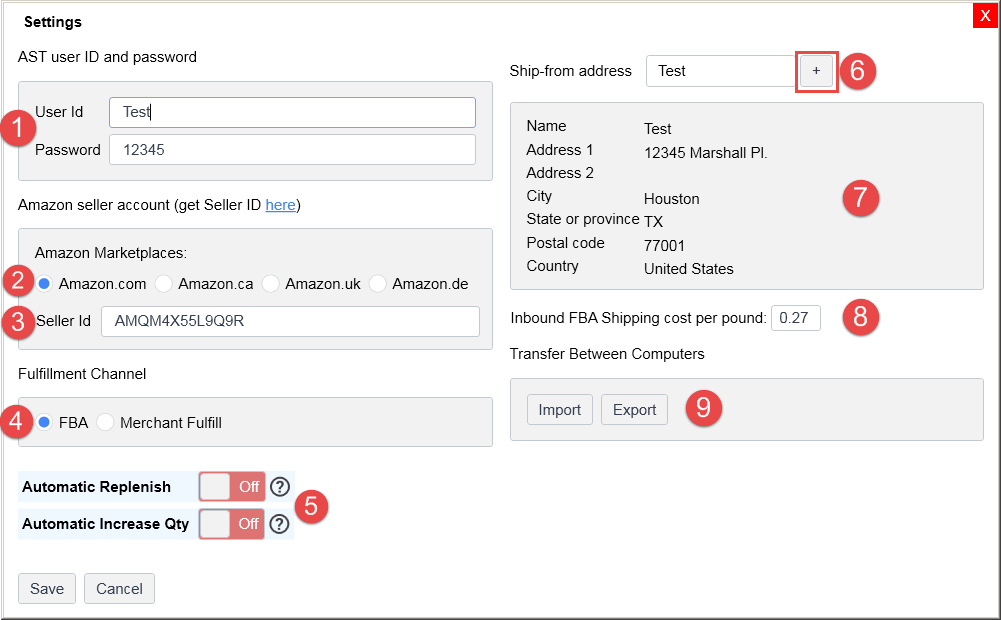
- AST User ID and password: You need to use the same user ID you used to sync your MWS account with ASellerTool.
- Amazon Marketplace: Select the country where you are using Amazon.
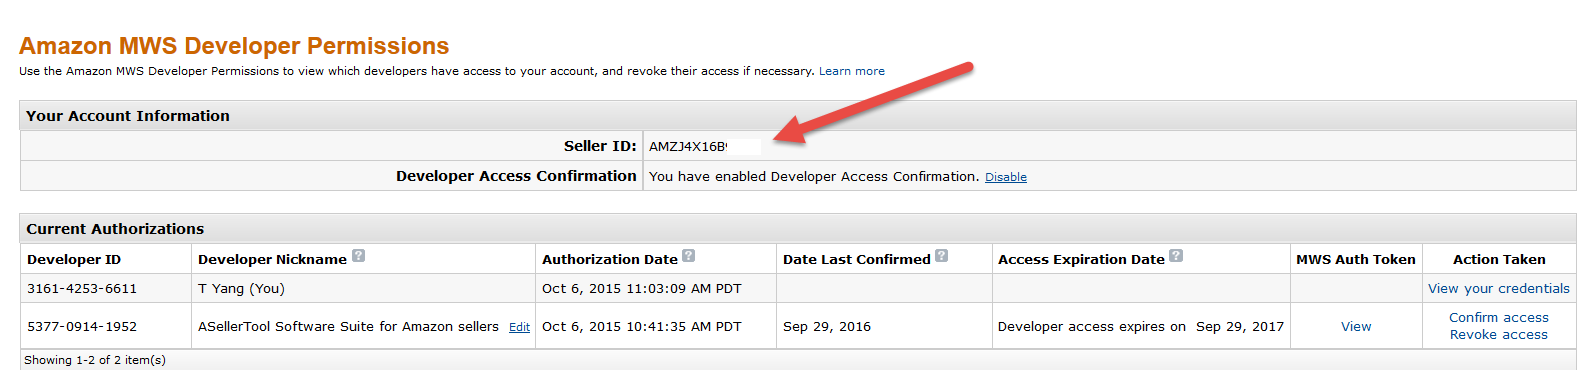
- Amazon Seller ID: You can find your seller account ID here.
![]()
- Fulfillment Channel: Choose to list your items as FBA or MF. You can switch between the two.
- Automatic Replenish/Automatic Increase Quantity: Turn these on and TurboLister will automatically prompt you to replenish items that are already in your Amazon inventory or increase the number of items that you’ve already added to the current batch.
- Ship-from address (FBA only): select the address where you ship your FBA items from. Click the “+” button to add or edit your address.
- Address: This is the current address being used.
- Inbound FBA Shipping Cost Per Pound: Enter the cost per pound for you to ship your items to Amazon when using FBA.
- Transfer Between Computers: Click “Export” to backup your settings and work into a .json file. Click “Import” to retrieve your backup. The backup file is also where we can help you troubleshoot.
Feedback
Copyright © 2024 ASellerTool, Inc.
—
Powered by 
Post your comment on this topic.