
- Enable the 2D barcode from your seller account.
- Print out the 2D barcode.
- Enter weight for each box and pay for the shipment.
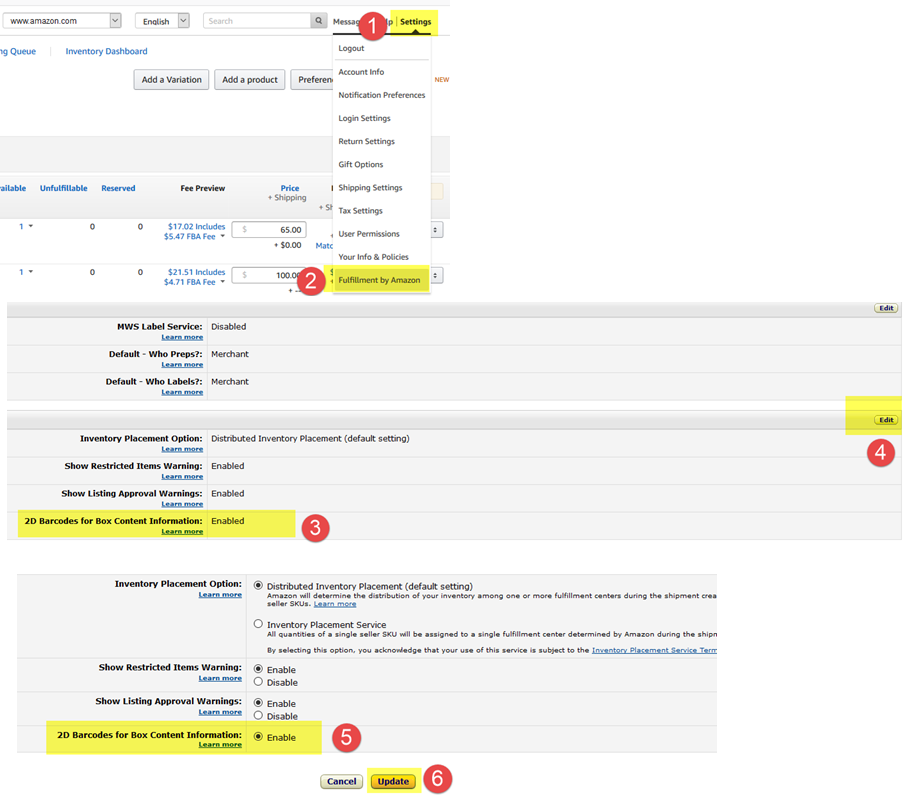
Before you can print out the 2D barcode for the box content, you need to enable it from your Amazon seller account. You only need to do it once.
- Go to your Amazon seller central page, click Settings (1), then Fulfillment by Amazon (2)
- Find the section with 2D Barcodes for Box Content Information (3), click Edit (4)
- Enable 2D Barcodes for Box Content Information (5), then click Update (6)
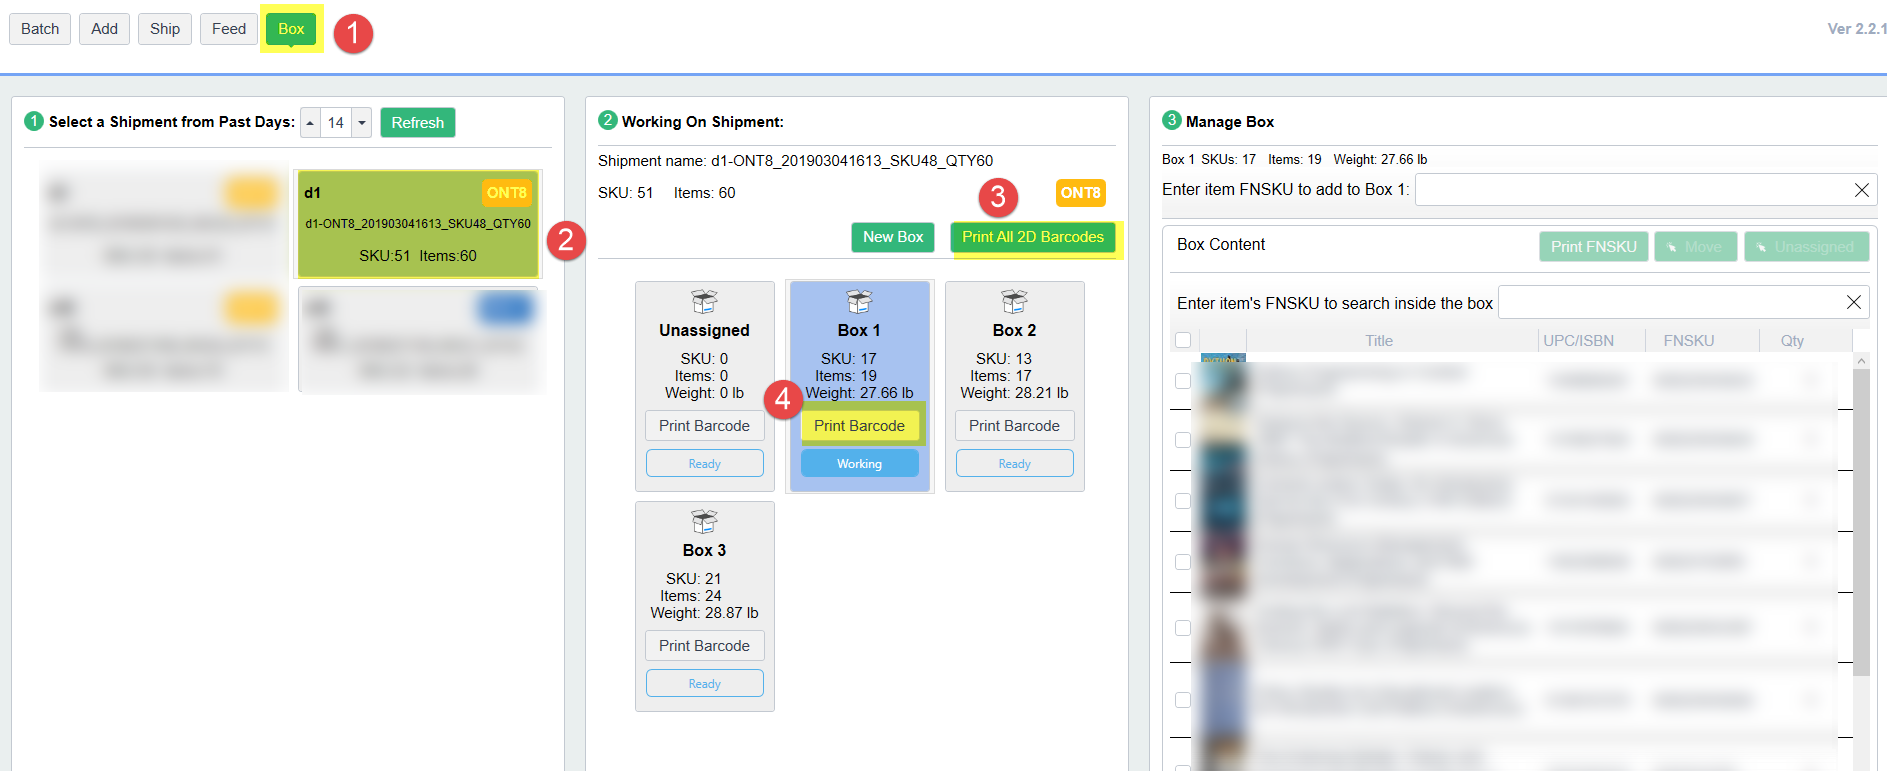
To print out the 2D barcode for the box content, please follow the steps below:
- Click “Box” (1).
- Select a shipment (2).
- Click “Print All” (3) to print out the 2D barcode for all boxes.
- Or click “Print Barcode” (4) on a selected box.
- The program will print out 2D barcode in a 4×6 label, so you can use Zebra 2844 or Dymo 4XL label printer.
Video Demo
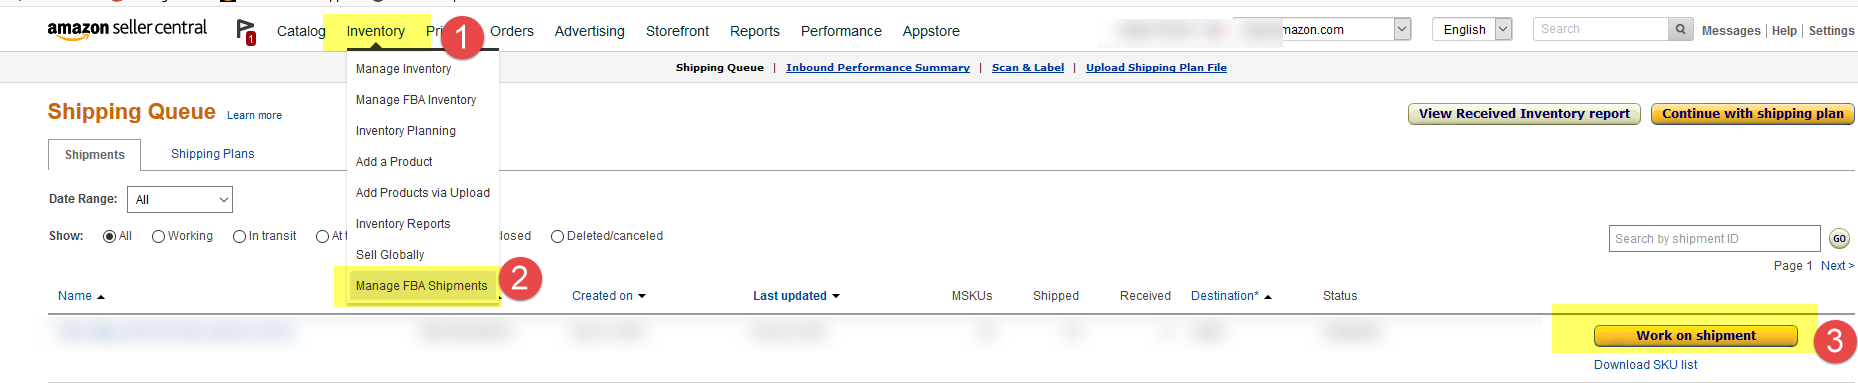
Enter the weight of each box on Amazon seller central and pay for the shipment.
- Go to your Amazon seller central page, click Inventory (1), then Manage FBA Shipments (2).
- Find the shipment you are working on, click on Work on the shipment (3)
- Select More than one SKU per box (4)
- Select Use 2D barcodes (5)
- Enter the number of boxes in this shipment (6)
- Click set number of boxes (7)
- Enter the weight for each box.
![]()

Feedback
Copyright © 2024 ASellerTool, Inc.
—
Powered by 
Post your comment on this topic.