
- Confirm box weight and dimension, and print out the shipping label
- Verify the box content option
- Print 2D barcode labels for the box content
- Check the manual processing fee of a recent shipment
Confirm Box Weight, Dimension, and Print out the Shipping Label
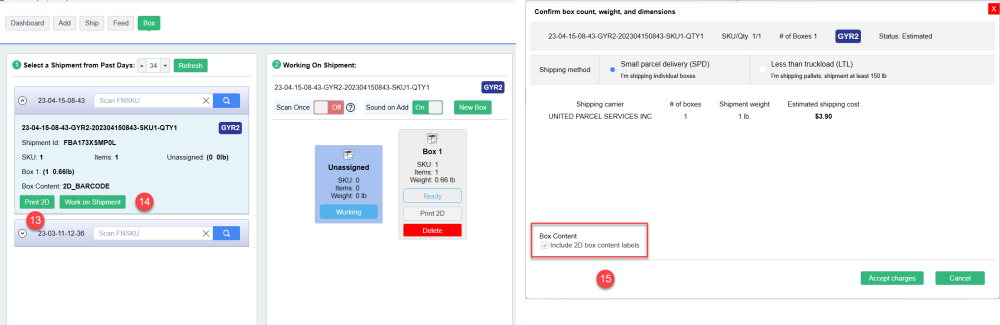
- In the box screen (1), once you have finished assigning items to the boxes (2), you click on “Work on Shipment”(3). This shipment’s current box content option is near (3).
- You will be directed to the screen where you can confirm the weight and dimensions of the boxes. If shipping less than 30 boxes, select “Small parcel delivery.” (4)
- Selecting “Fill estimate box weight” (5) will automatically fill in the box weight based on Amazon’s information. Alternatively, you can manually enter the actual weight of the box with a scale.
- You enter the weight of the packing materials and the box itself in (6). The total weight of the box will then be displayed on (7).
- To apply the dimensions of a specific box, you can click on the corresponding box name (8). If you need to create a new box size, click the “+” button (9).
- When selecting the output label size(10), if you have a 4 × 6 thermal labels printer such as Zebra 2844 or Rollo, you should choose the 4 × 6 thermal label option. However, if you only have a regular printer, you should choose the “2 labels per page” option, which will format the label to fit two labels on a standard 8.5 × 11-inch page.
- Click on Estimate(11), and the program will estimate the shipping cost. If you are fine, click “Accept charges” (12) to pay for the shipping service. You can also click once on the “Estimate & Accept” button (12).

- The program will generate the Amazon shipping label and 2D barcode labels (if you choose that option),
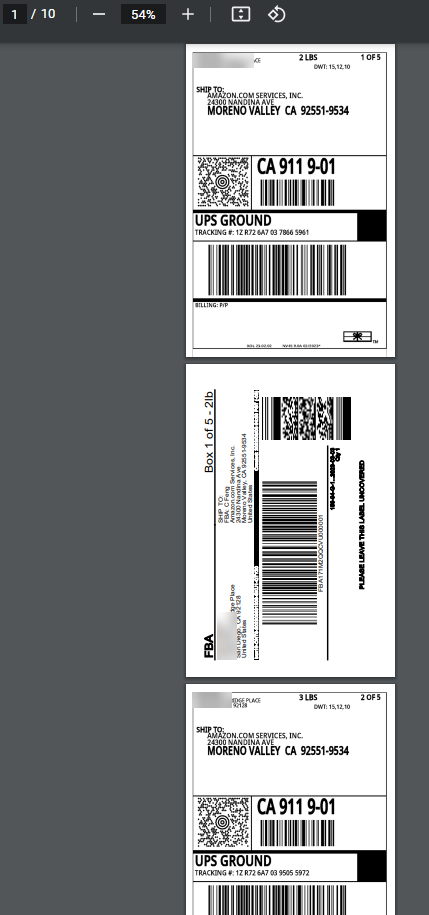
Print 2D barcode labels for the box content.
You can print out 2D barcode labels for your box content either in the shipment detail section (13) or click on the “Work on Shipment” button (14), click the “Estimate” button in the popup screen, then checkmark the option (15). This will print out 2D barcode labels along with your shipping labels.
Verify the box content option and confirm no manual processing fee:
Ensure you follow the steps above to print the shipping label. After that, if you want to verify the box content option you selected for this shipment and confirm that there is no manual processing fee, follow the steps below. Please note that Amazon keeps changing its website, so you may not be able to verify due to Amazon no longer allows you to visit this page by redirection:
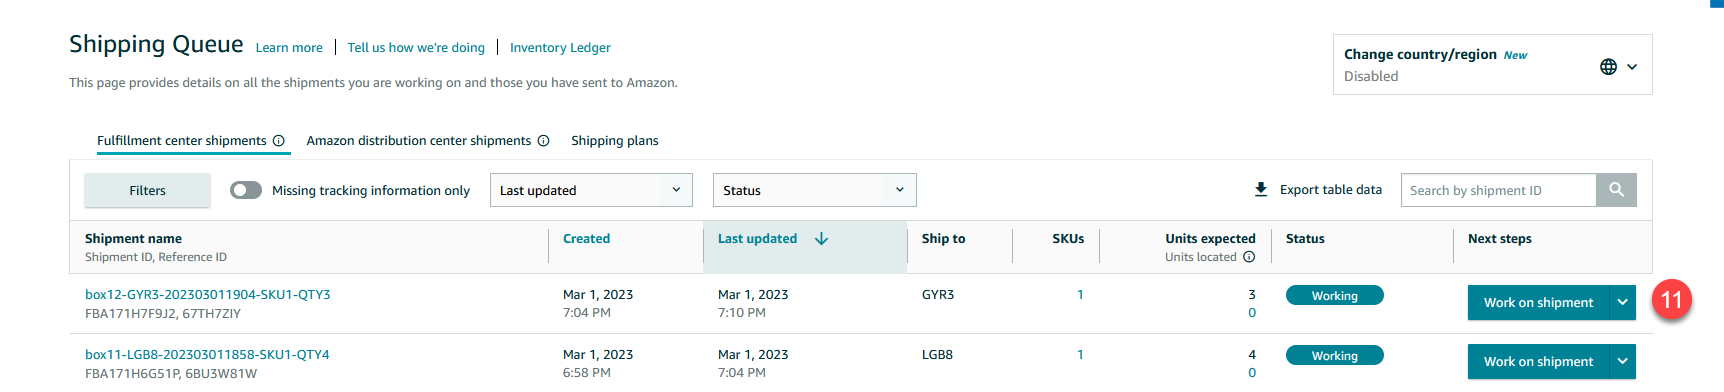
- After you confirm & accept (10) this shipment and print out shipping labels from TurboLister, go to your Amazon FBA shipment page here.
- Find your shipment and click “Work on shipment” (11)
![]()
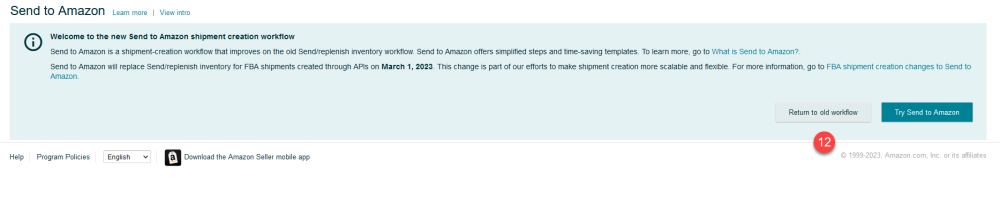
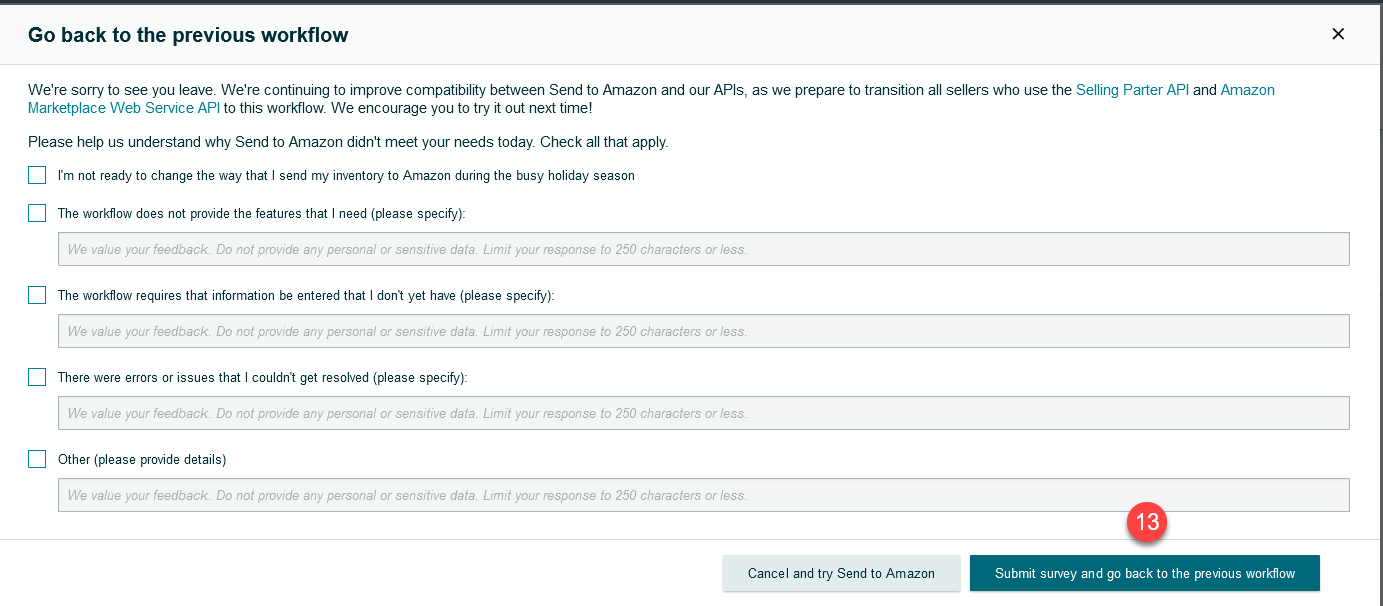
- Click “Return to old workflow” (12). Do not click the “Try to Send to Amazon” button. If you click on it, this shipment will be converted into a “Send to Amazon” workflow, and you can no longer work on it in TurboLister!
![]()
- You do not need to fill in anything. Just click “Submit the survey and go back to the previous workflow.” (13)
![]()
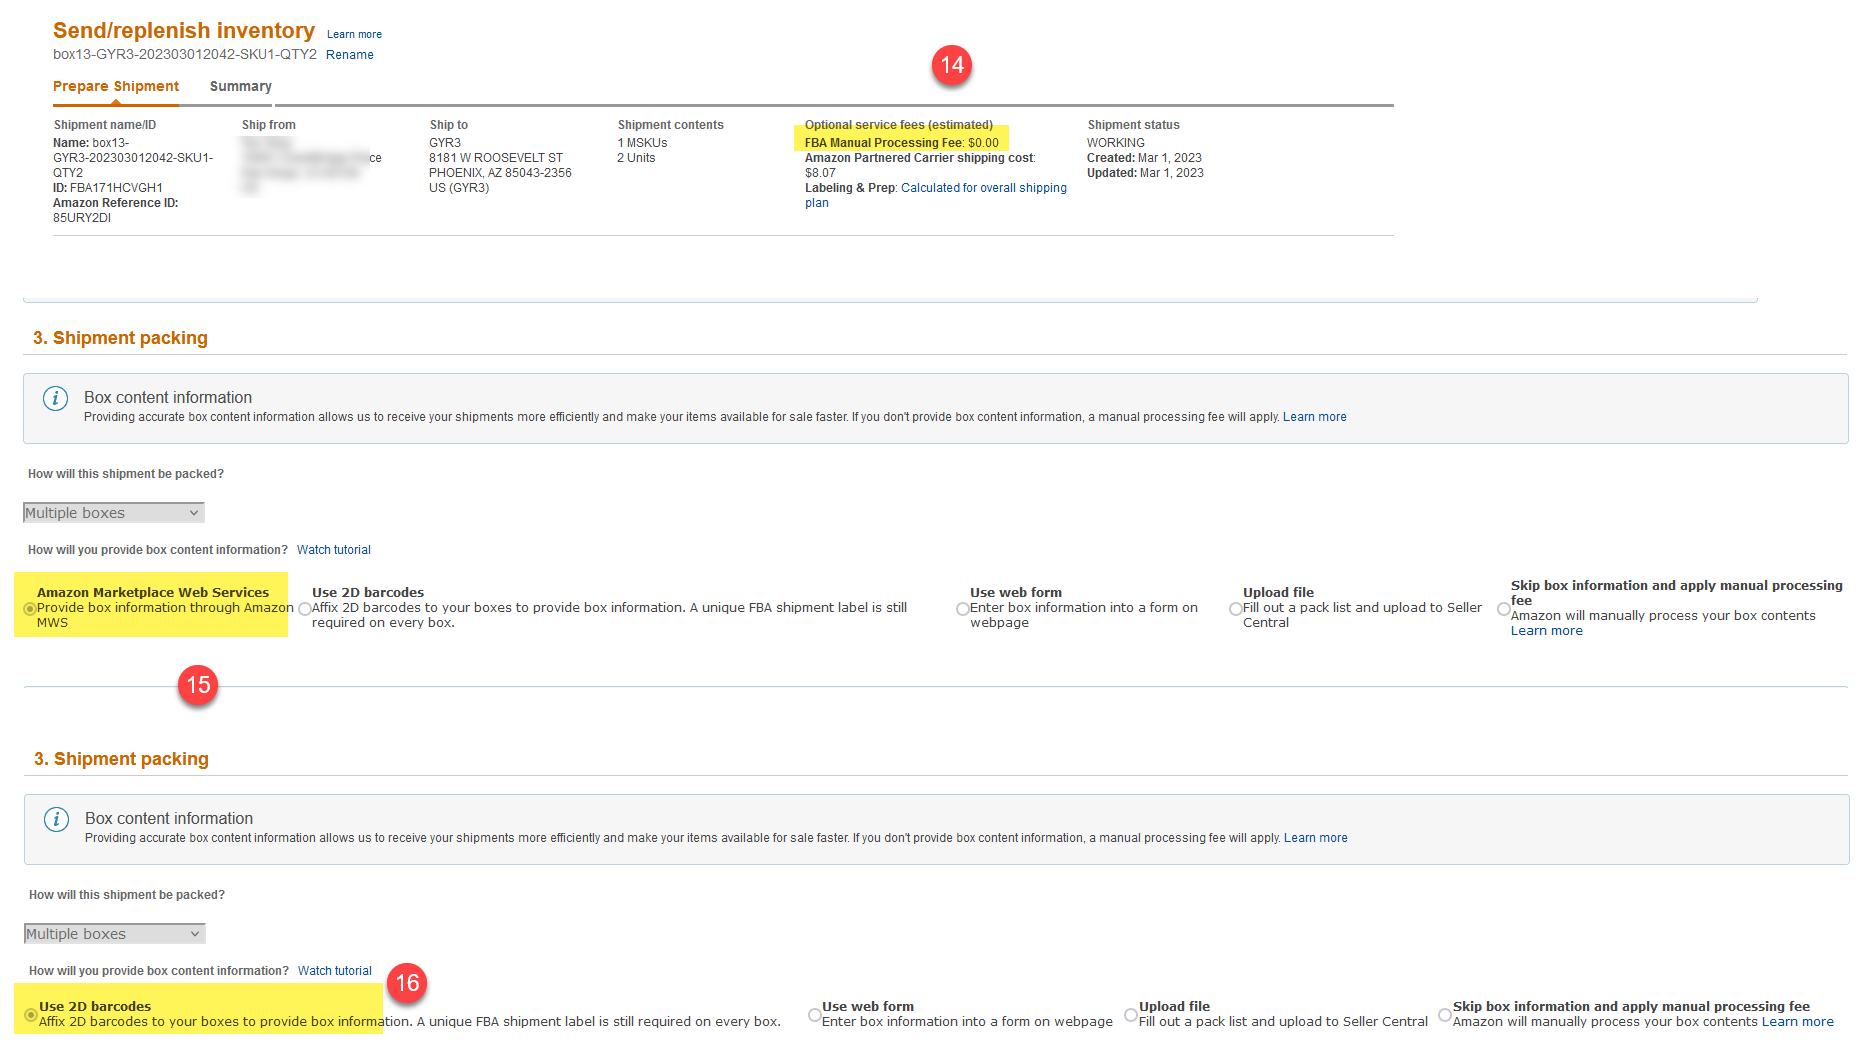
- In the “Shipment packing” section, if you choose to use “Feed” for the box content, you should see “Amazon Marketplace Web Services” (15) selected. Alternatively, if you choose to use “2D Barcode” for your box content, you should see “Use 2D barcodes” (16) selected. This will ensure that your boxes are not subject to Amazon’s manual processing fee upon receipt.
Check the Manual Processing Fee of a recent shipment
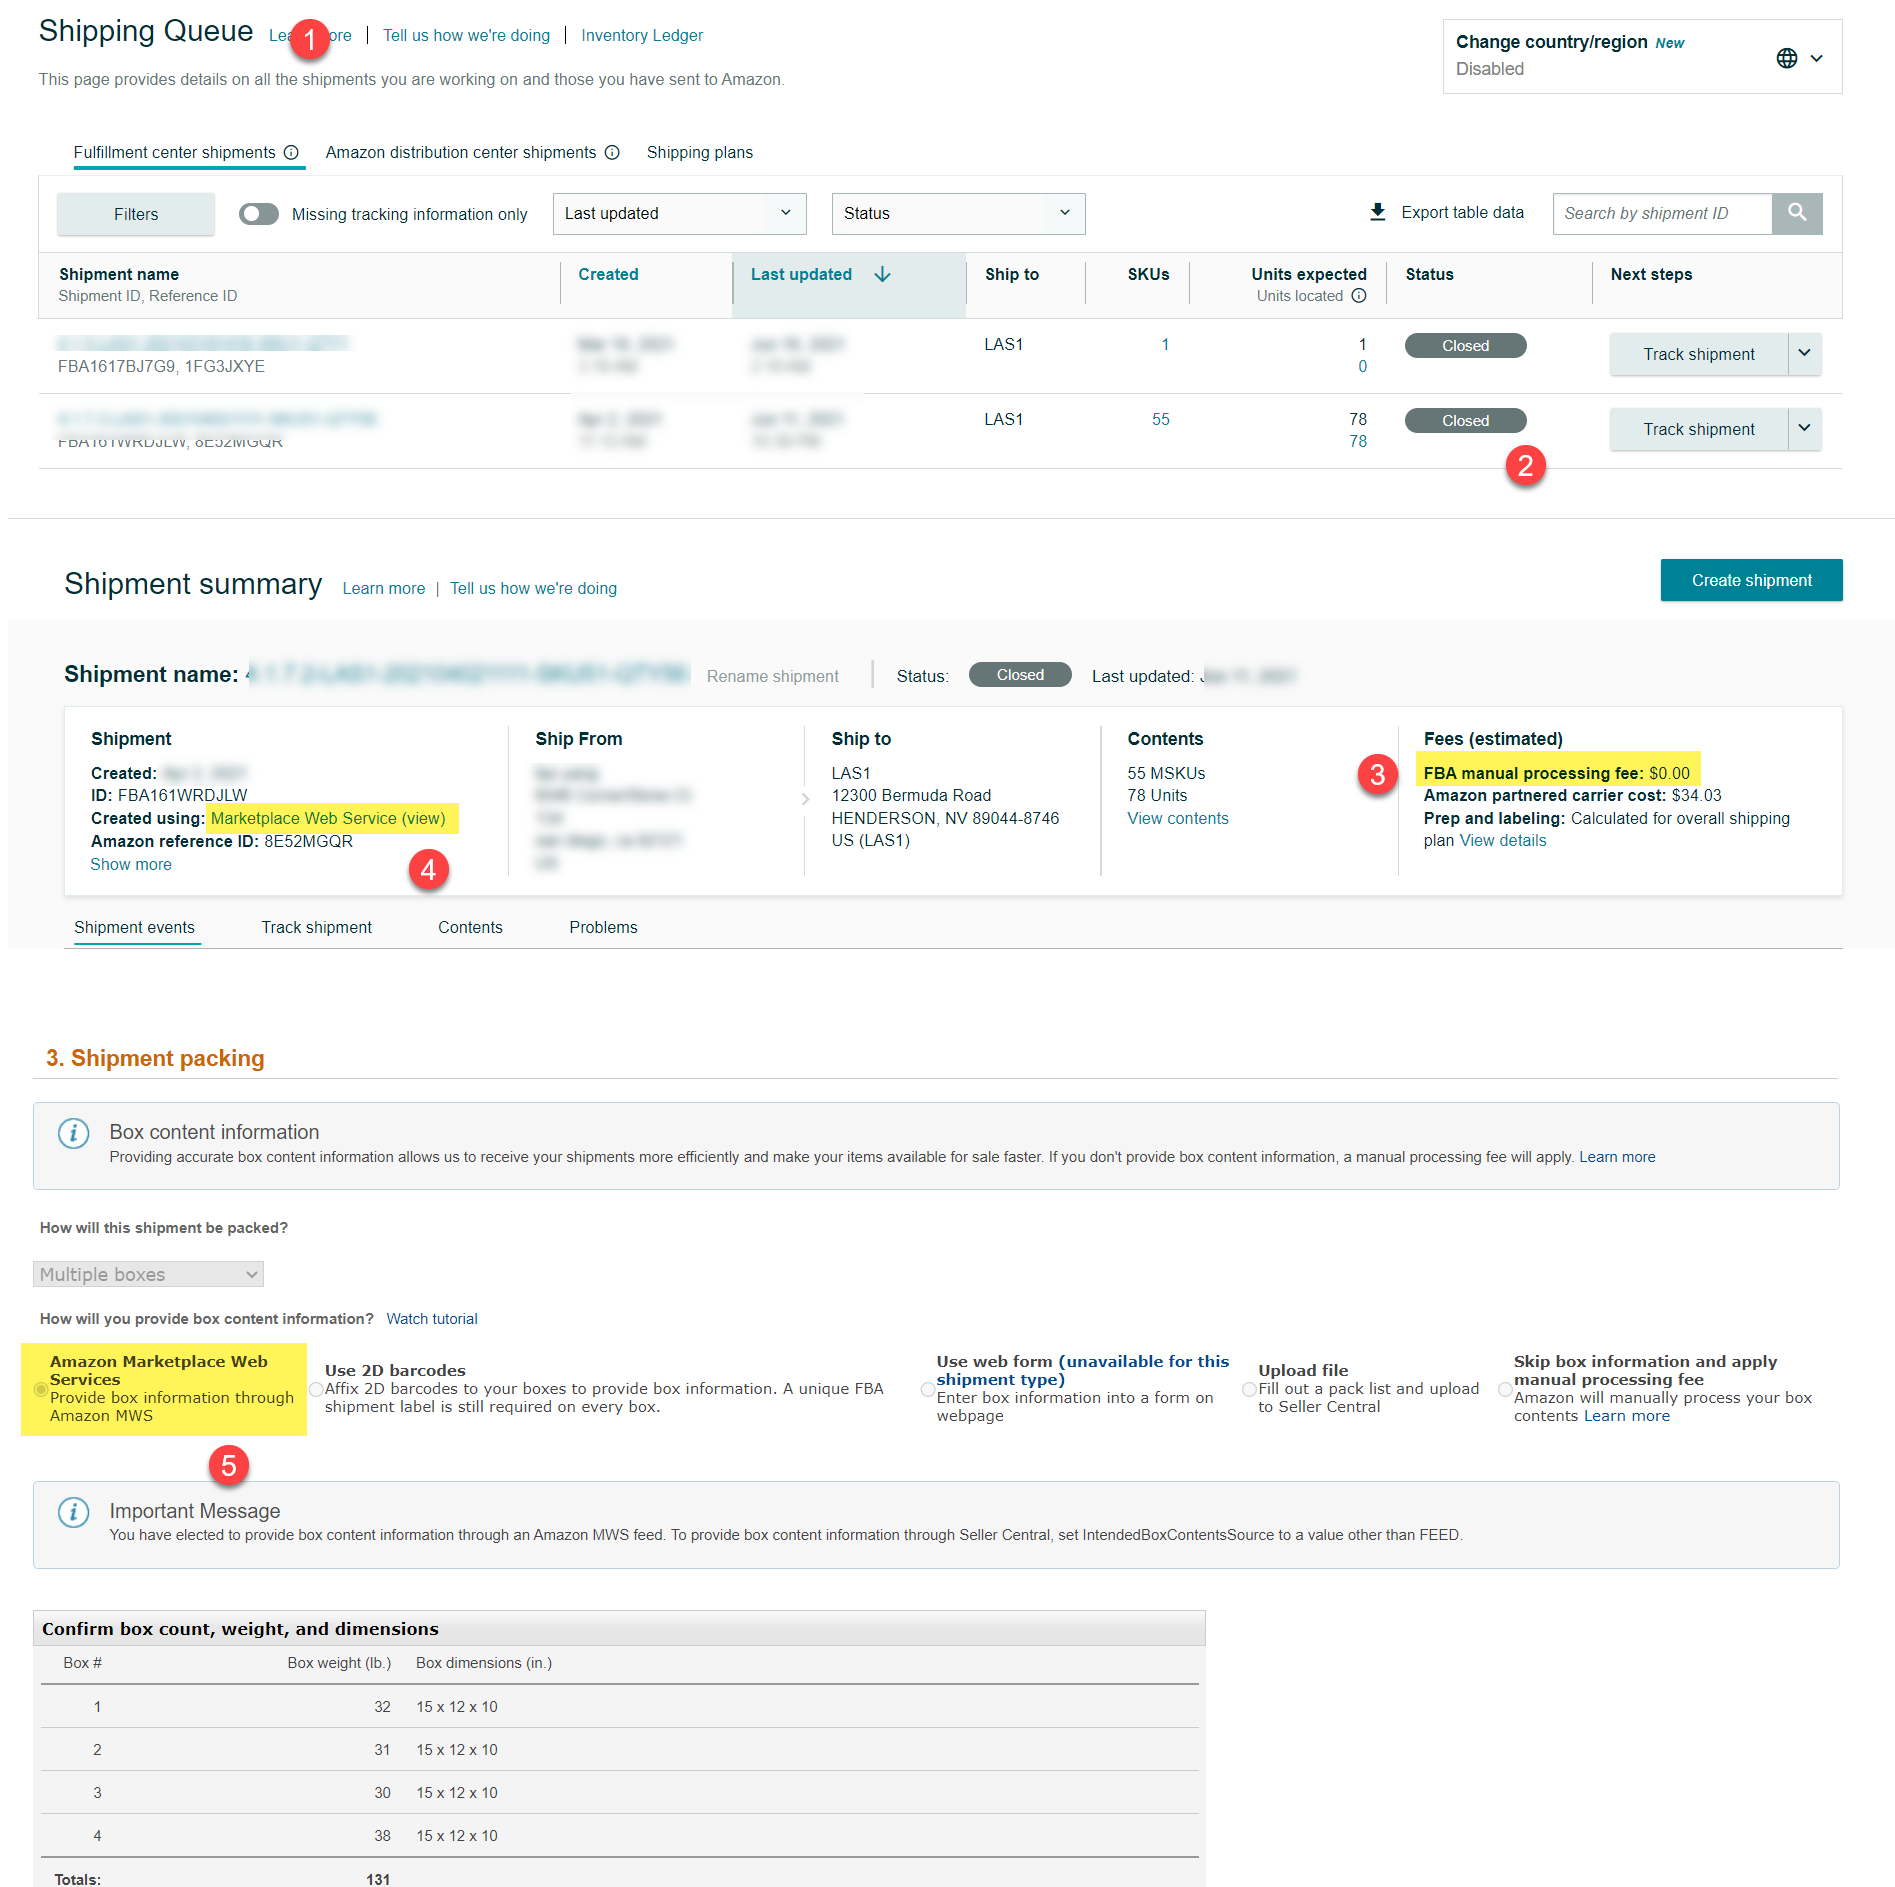
- Go to Shipment Queue (1)
- Find the shipment you want to check, and click the “Closed” or “Tracking” buttons. (2)
- If you use TurboLister Feed or 2D barcode for the box content and print out the shipping label in TurboLister, you should see the manual processing fee be zero. (3)
- If not, click Marketplace Web Service (4). If you cannot find it, you did not use TurboLister to create this shipment properly.
- Navigate to the Box content information section and see either Amazon Marketplace Web Services (if you use Feed) or Use 2D barcodes (if you use 2D) selected.
Feedback
Copyright © 2024 ASellerTool, Inc.
—
Powered by 
Post your comment on this topic.