
Step by step tutorial on how to eliminate split shipments and also reduce your box content work:
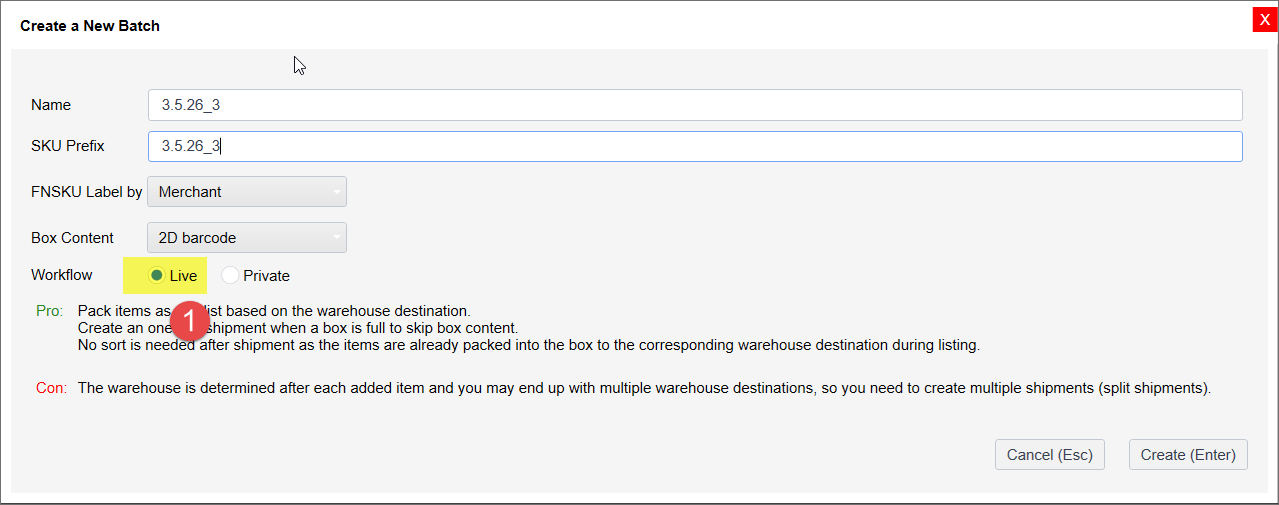
- Create a new Live (1) batch
- Because you are working in a live batch, you will see a lot of splits (2) across many Amazon fulfillment centers. This is OK, just keep adding items.

- When the shipment box for your preferred fulfillment center is full, click inside the fulfillment center block (3). Then click the New Box button (4) and click the Save button (5). The program will add your subsequent items to the 2nd box for this fulfillment center.

- Now the program is showing that subsequent items will be added to box #2 (6) for the fulfillment center LAX9.

- After you have finished adding all your items, click the Ship button (7) to go to the shipment screen. Click Create Shipment button (8). You will see a lot of split shipments. Here you will see the magic of Holding Bin: click the checkbox (9) to select all shipments, then uncheck your preferred shipment (10), then click the “Move to Holding Bin” button (11). TurboLister will move items not going to your preferred fulfillment center, to the Holding Bin.
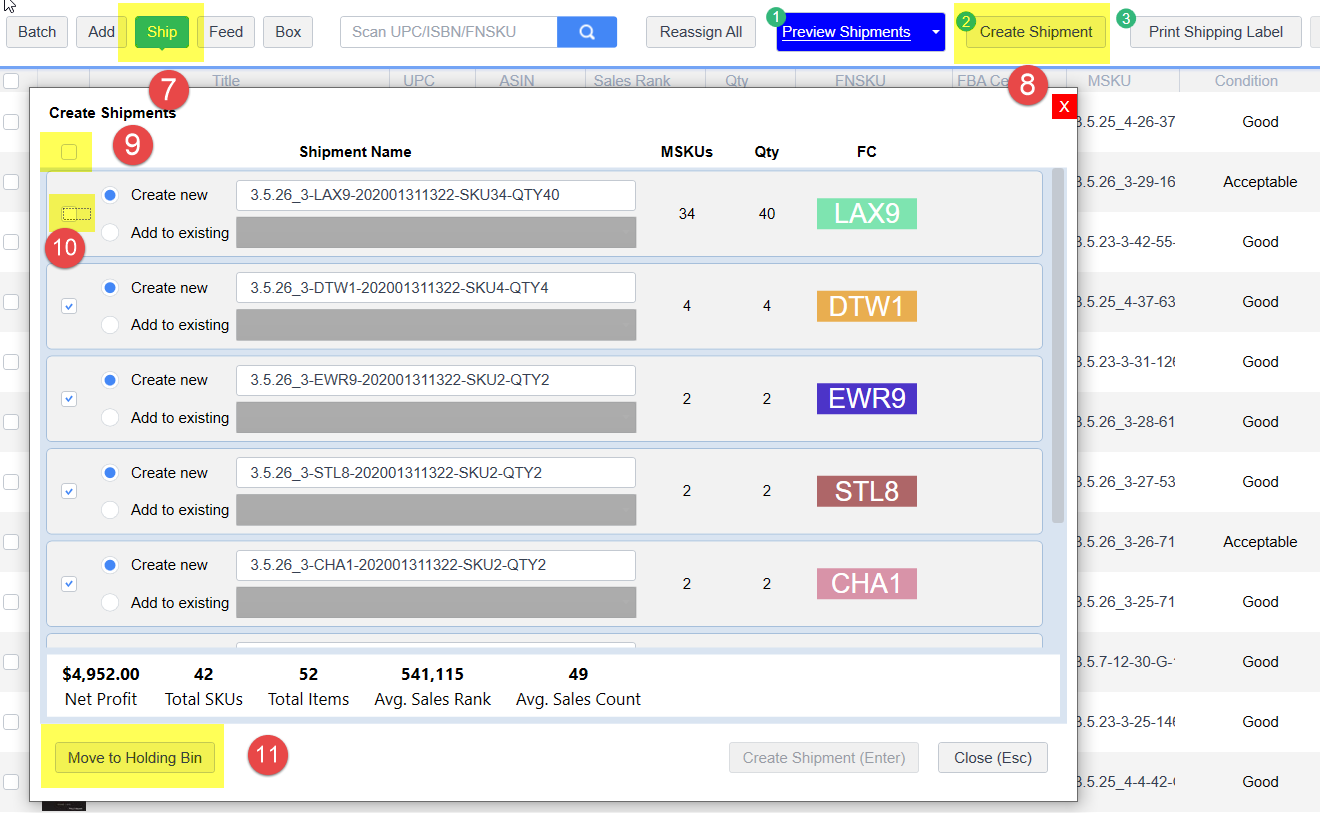
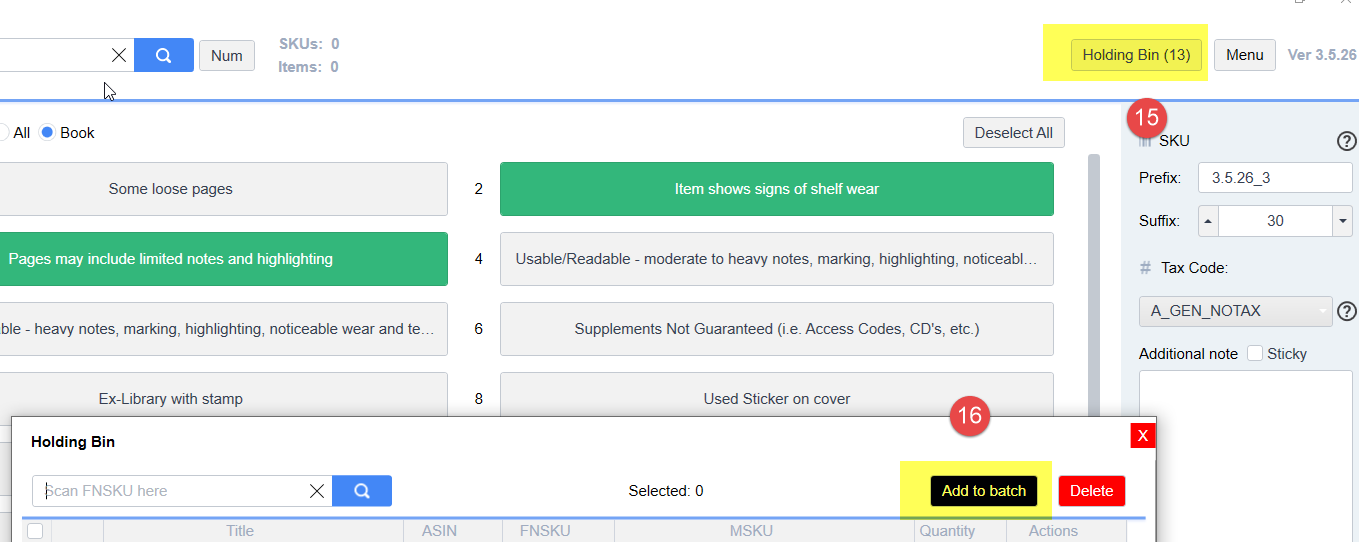
- Notice there are now 13 items in your Holding Bin (12).
Then proceed with shipment creation for the preferred fulfillment center. First select the “Create New” radio button (13), enter a shipment name on the textbox, then click the “Create Shipment” button (14) to create a new shipment.

- Go back to the “Add” screen, click the “Holding Bin” button (15), then click the “Add to Batch” button (16). This will add your items from the Holding Bin to your current batch.
- Go to the Ship screen, repeat from step 5 to remove items that are not going to your preferred fulfillment center, to the Holding Bin.
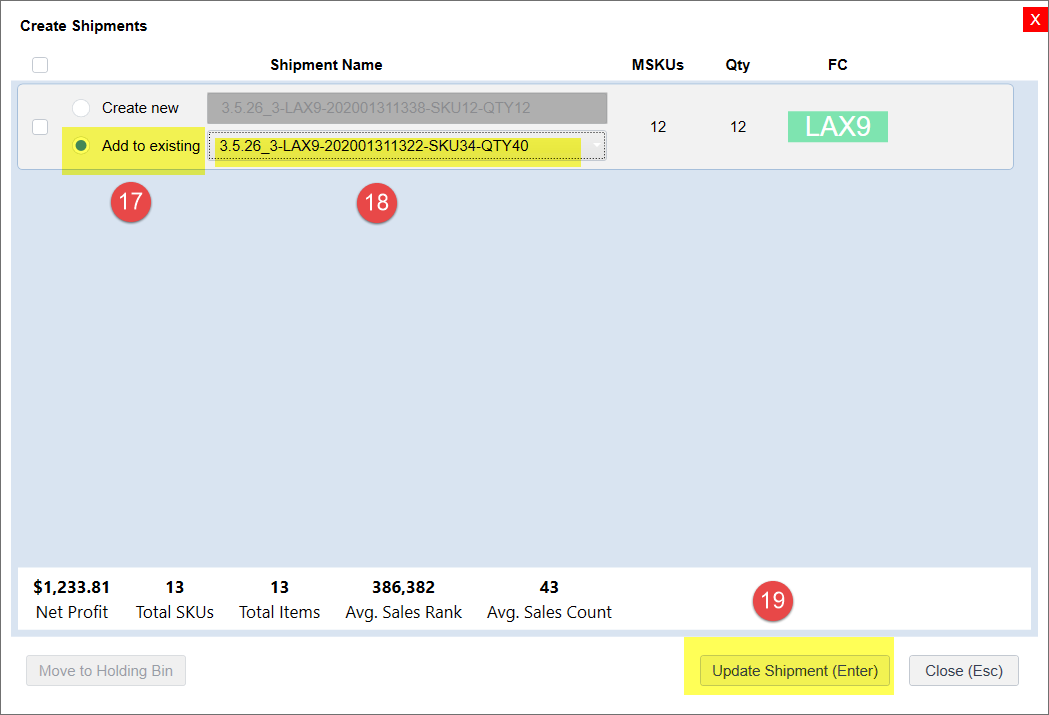
For the items that are going to your preferred fulfillment center, select the “Add to the existing” radio-button (17), select the shipment you just created (18), then click the “Update Shipment” button (19). Now you have added more items in one shipment.
Repeat the steps above until no more item in your Holding Bin is going to your preferred fulfillment center. You can leave them in the Holding Bin and wait for the next batch.
- Go to the Box screen, click on the block of the current shipment, this will open up the box details for that shipment. You will see that 40 out of your 52 items are already assigned to a box (20). So you do not need to do box content for these 40 items. Since you have 12 items added to this shipment from the Holding Bin, they are not assigned to a box yet (21). If they can fit into the last box or a new box, you can just move all of them with one click. (Refer to the tutorial for box content management for details) In the worst case, you only need to scan these 12 items for the box content, instead of 52 items. This is an 80% workload reduction for working on the box content.

Feedback
Copyright © 2024 ASellerTool, Inc.
—
Powered by 
Post your comment on this topic.