
Install Rollo Printer
The video tutorial is here.
- Install the printer’s driver here.
- After installing the Rollo driver, connect the printer’s USB cable to your computer and turn on the printer. The switch is on the right side near the bottom.
- The computer will detect the Rollo printer and add it to its printers’ list.
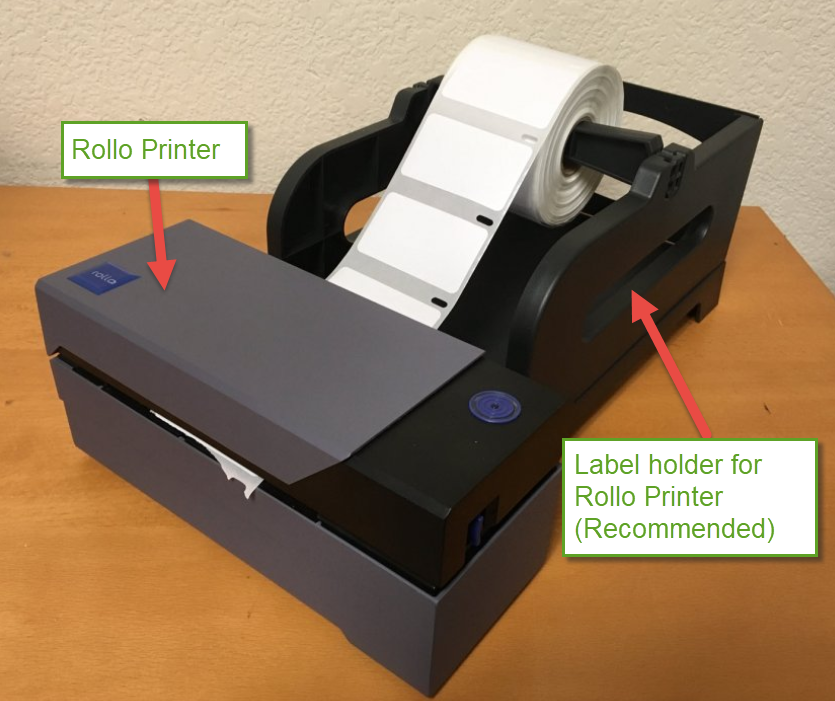
- Open the printer by sliding the blue latch to the left and adjusting the purple sliders inside to fit the width of your label.
- We recommend a Rollo label holder to feed the label to the printer easily. Place the label inside and facing upwards; close the printer cover.
- Hold down the button with the green LED until you hear one beep. The printer will begin an automatic label calibration.
Configure Rollo Printer to work with TurboLister
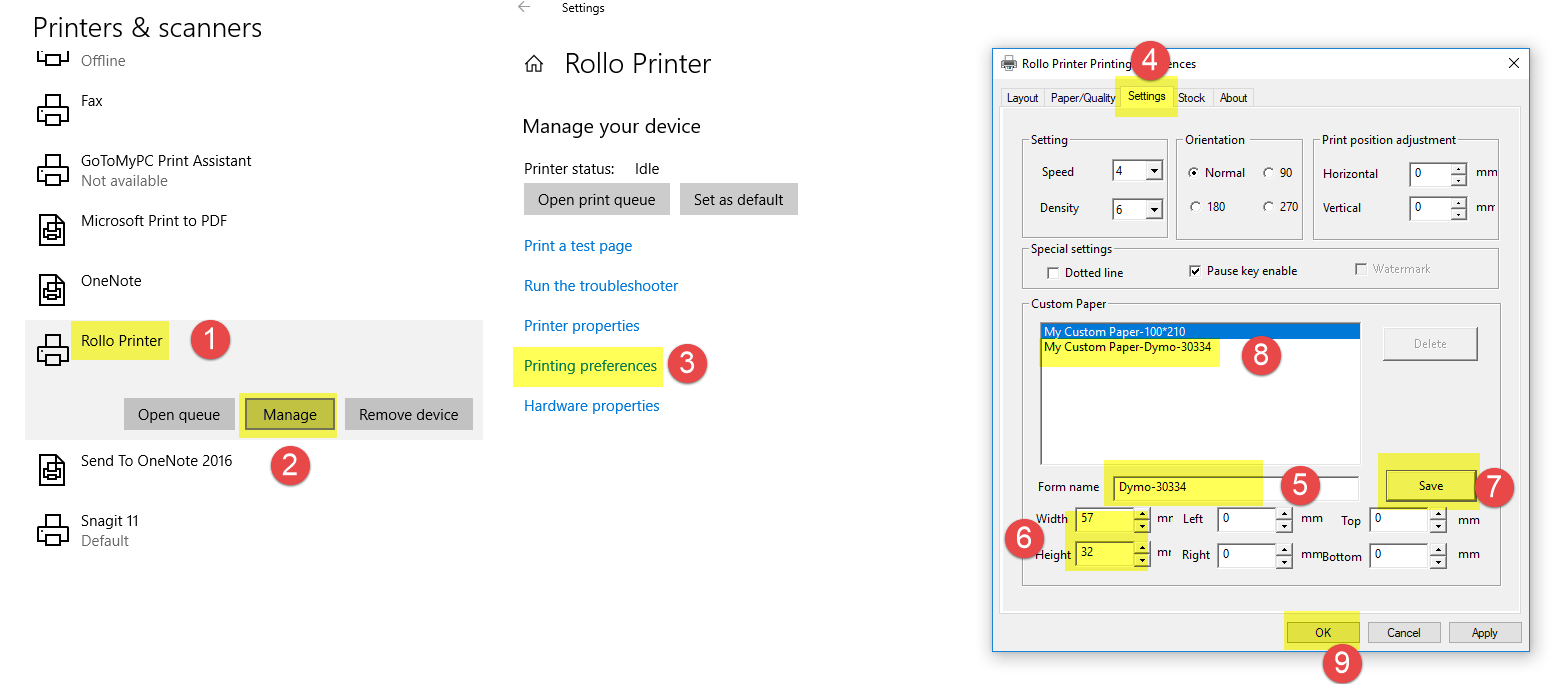
We use the Dymo 30334 label as an example. 30334 label is 2-1/4” × 1-1/4”, which translates into 57mm x 32mm. You should be able to use other Dymo labels by following the same steps below.
- Go to Printers & scanners from your computer, and click Rollo Printer.
- Click Manage
- Click Printing preferences
- Click Settings
- Click Form name, and enter a name for this label size. Ex. Dymo-30334
- Click width to enter 57 and click height to enter 32. A width of 57 and a height of 32 will translate into 2-1/4” × 1-1/4” to match the 30334 label size.
- Click Save
- Your new label size will appear under Custom Paper.
- Click OK.
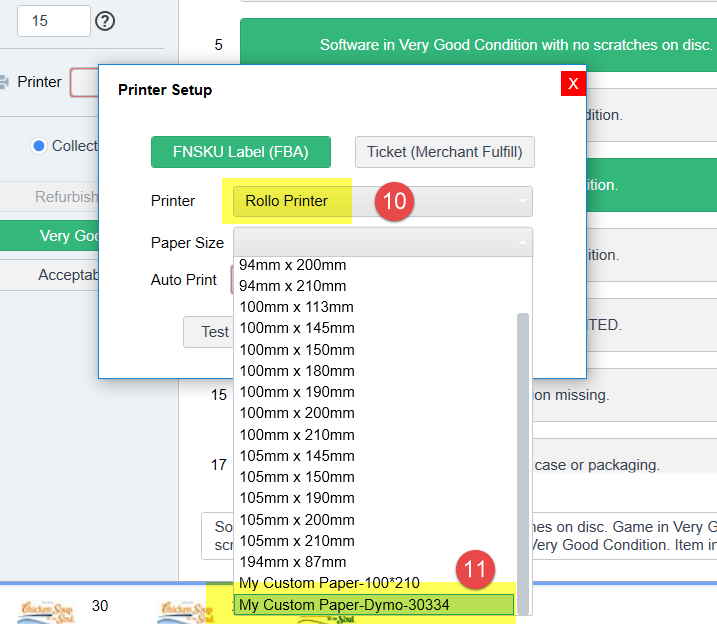
- Open TurboLister -> Menu ->Printer. In FNSKU Label (FBA), select Rollo Printer
- Select My Custom Paper-Dymo-30334. And click Test Print to check the FNSKU label. Now TurboLister can print out the FNSKU label with the Rollo printer.
Feedback
Copyright © 2024 ASellerTool, Inc.
—
Powered by 
Post your comment on this topic.