
How to install the Zebra 2844 Printer:
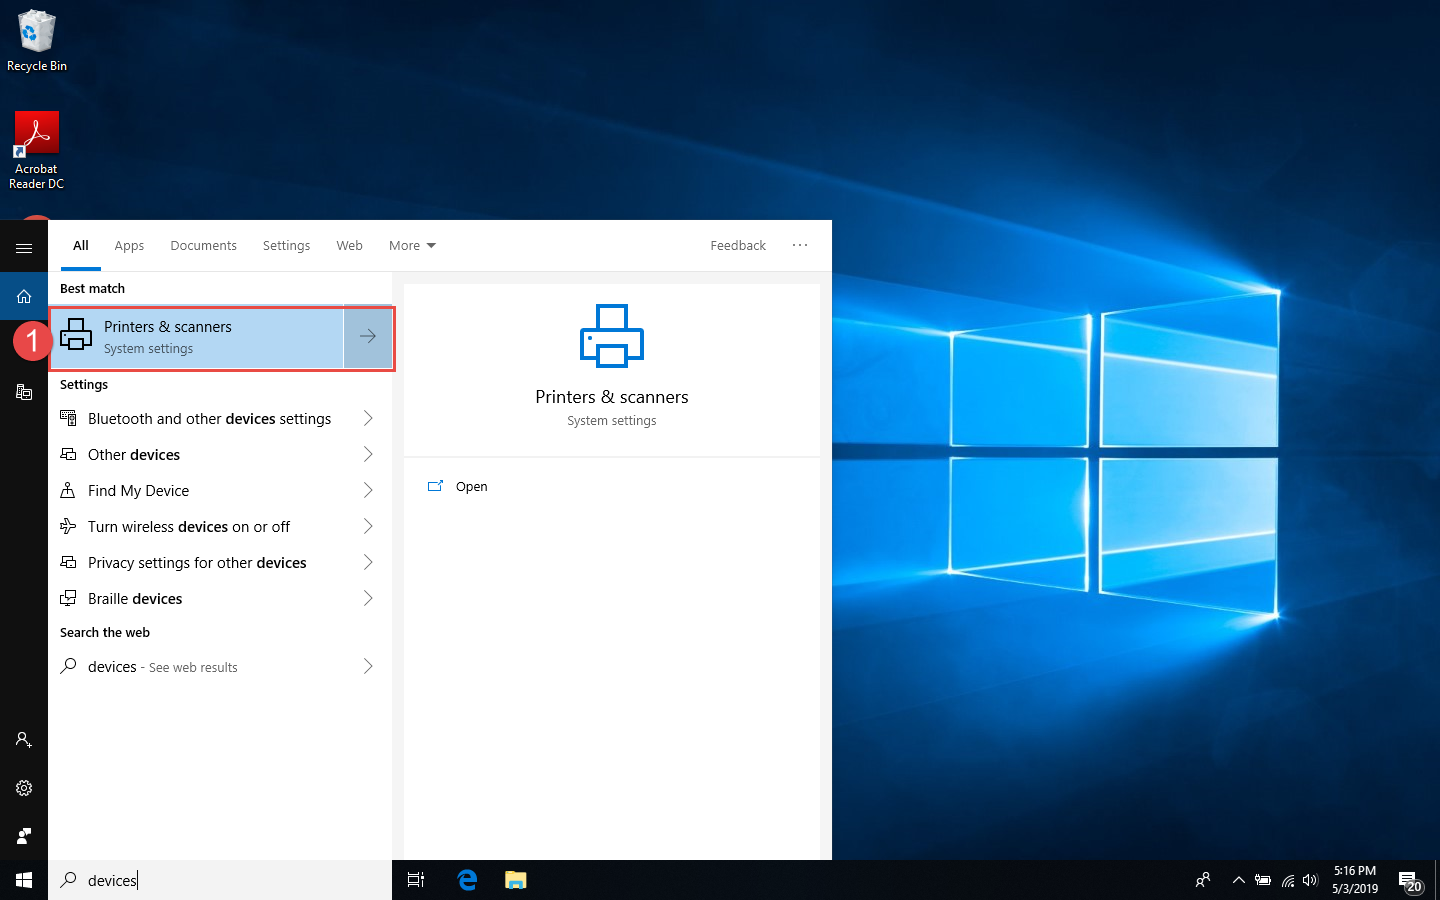
- Plug the printer into your computer’s USB port, then go to your computer’s “Printers and scanners” settings.
![]()
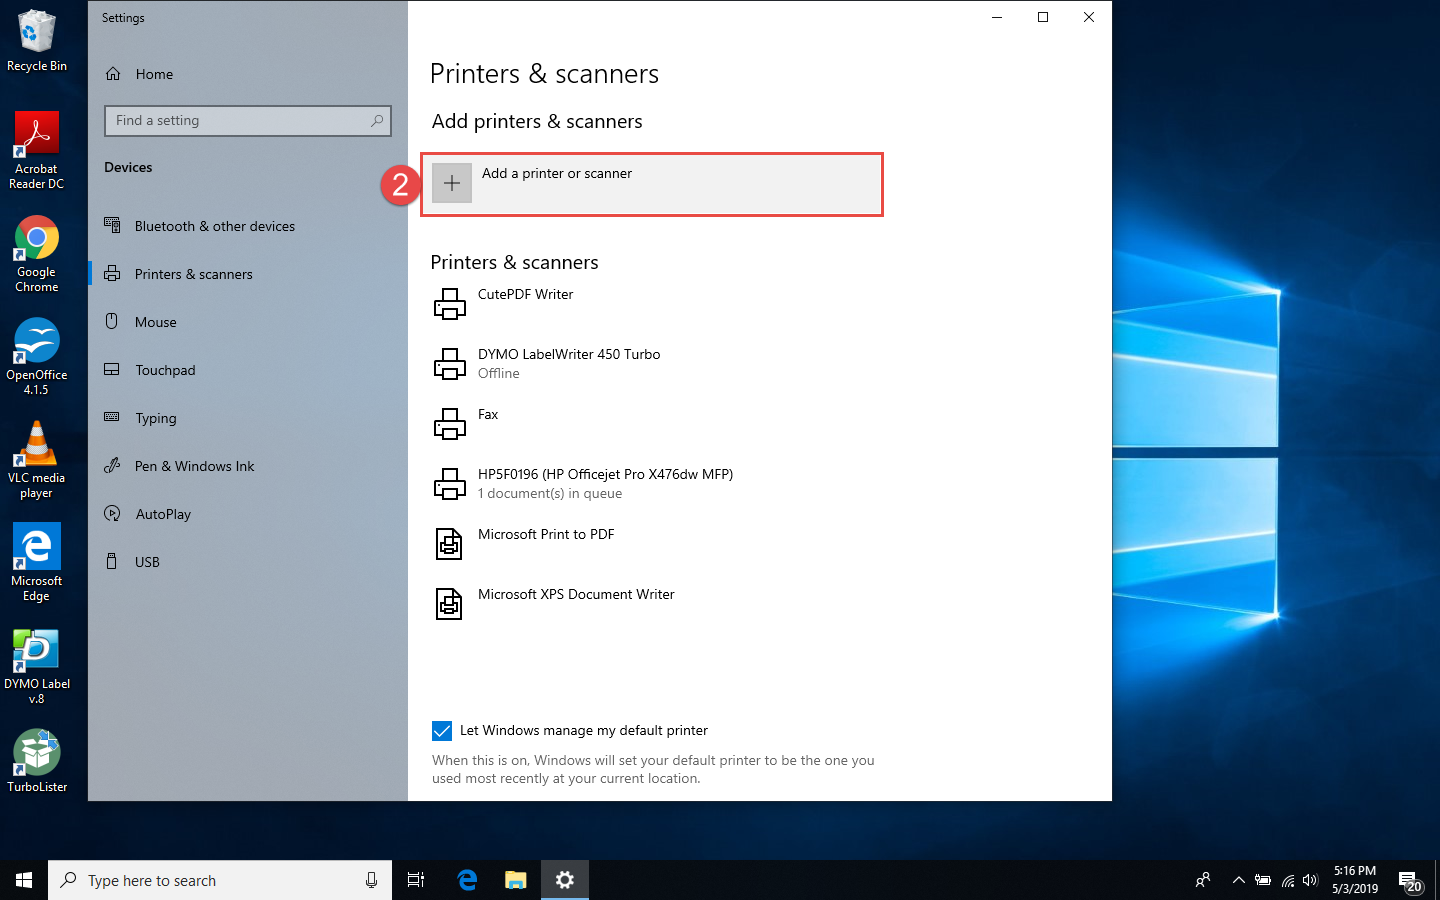
- In the “Printers and scanners” settings, select “Add a printer or scanner.”
![]()
- If you don’t see the ZDesigner LP 2844, then select “The printer that I want isn’t listed.”
![]()

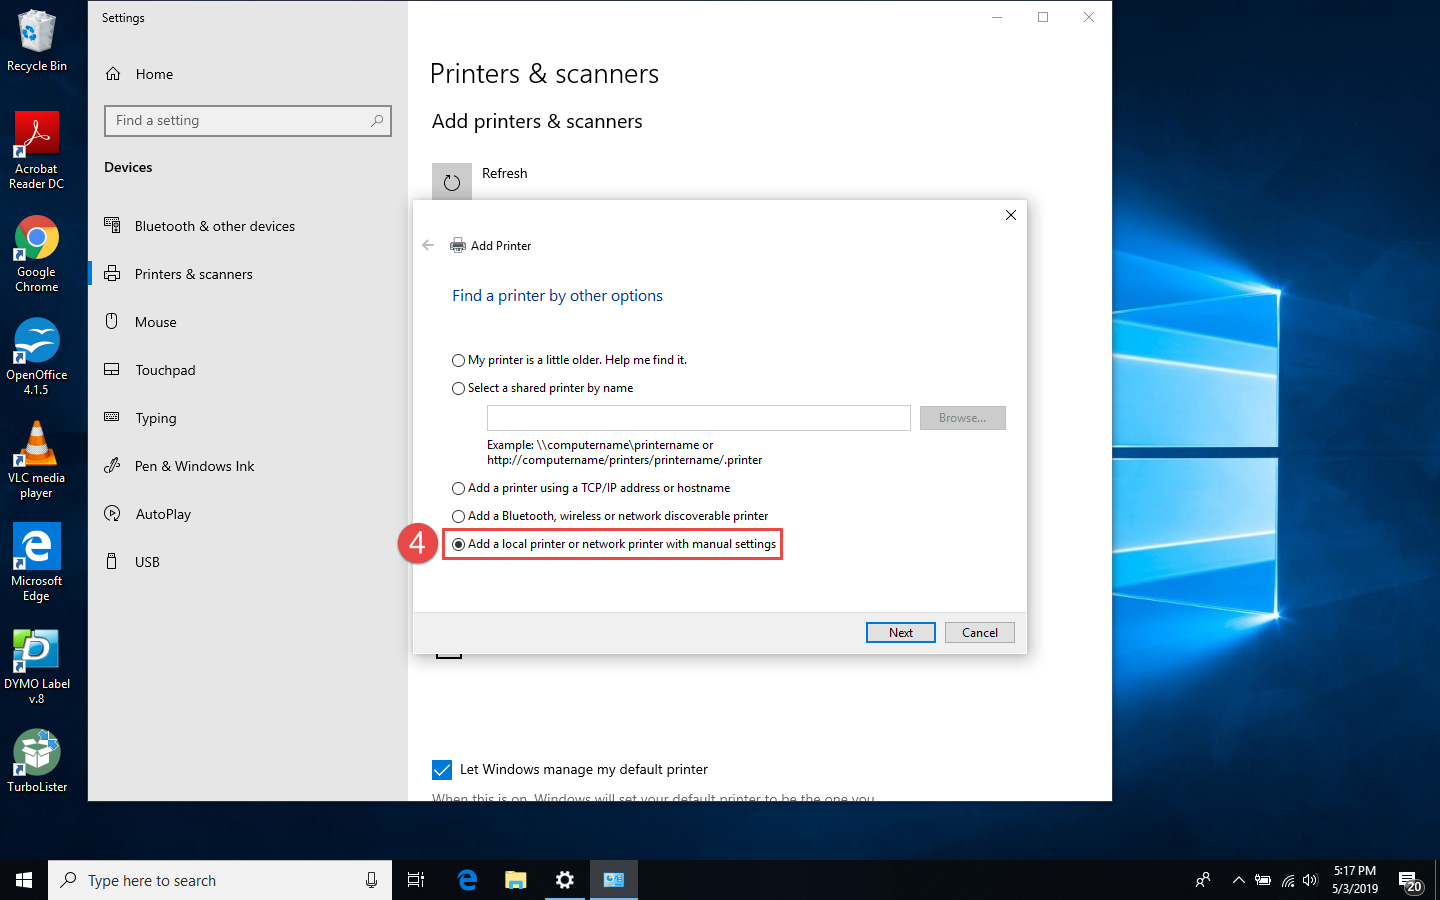
- Select “Add a local printer or network printer with manual settings.”
![]()
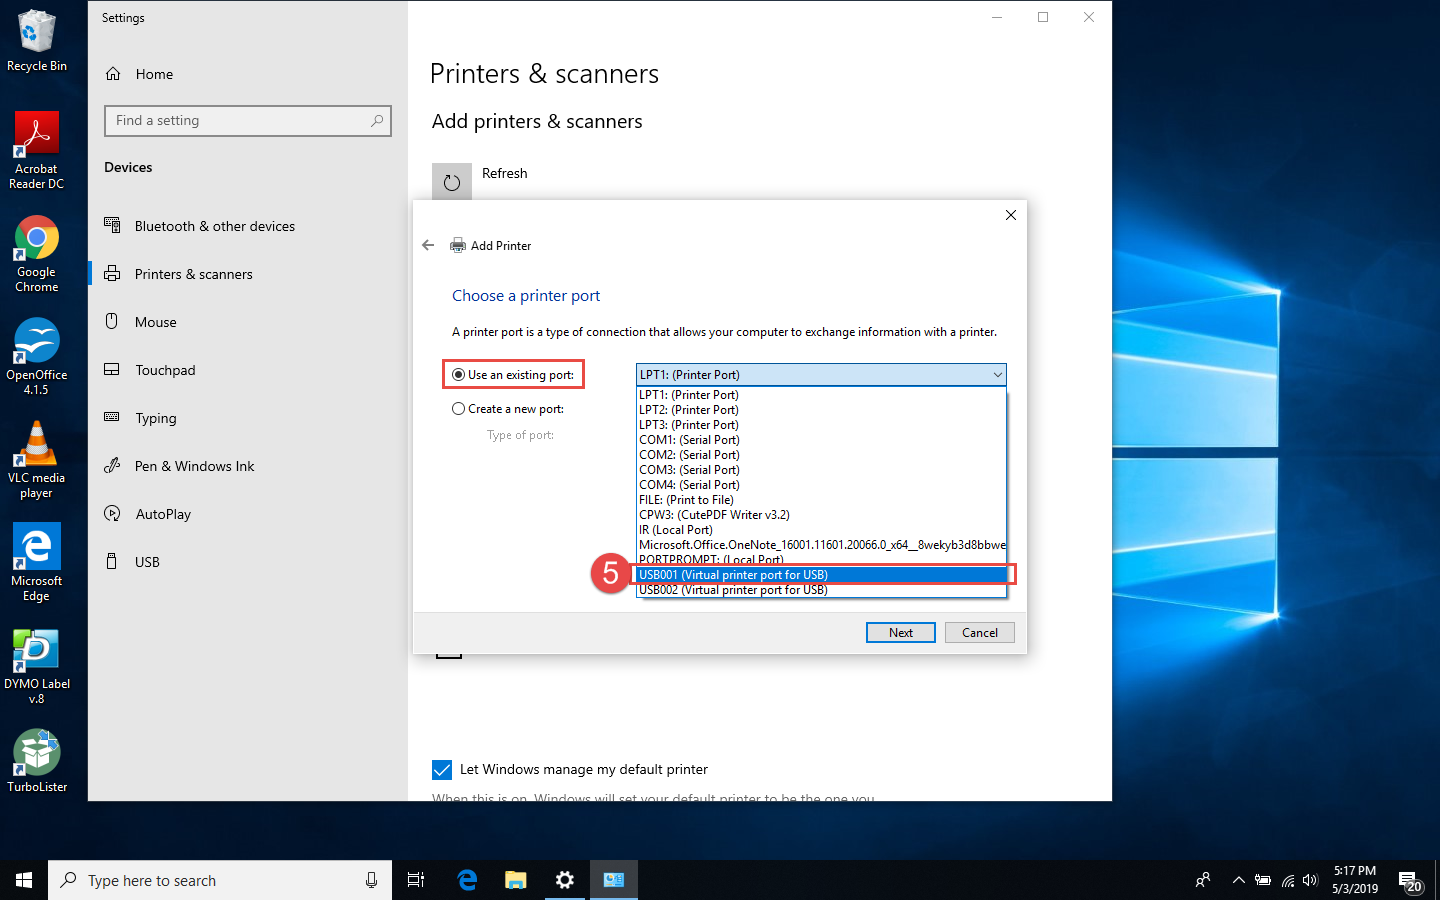
- Select “Use an existing port,” then select the USB port that your printer is plugged into.
![]()
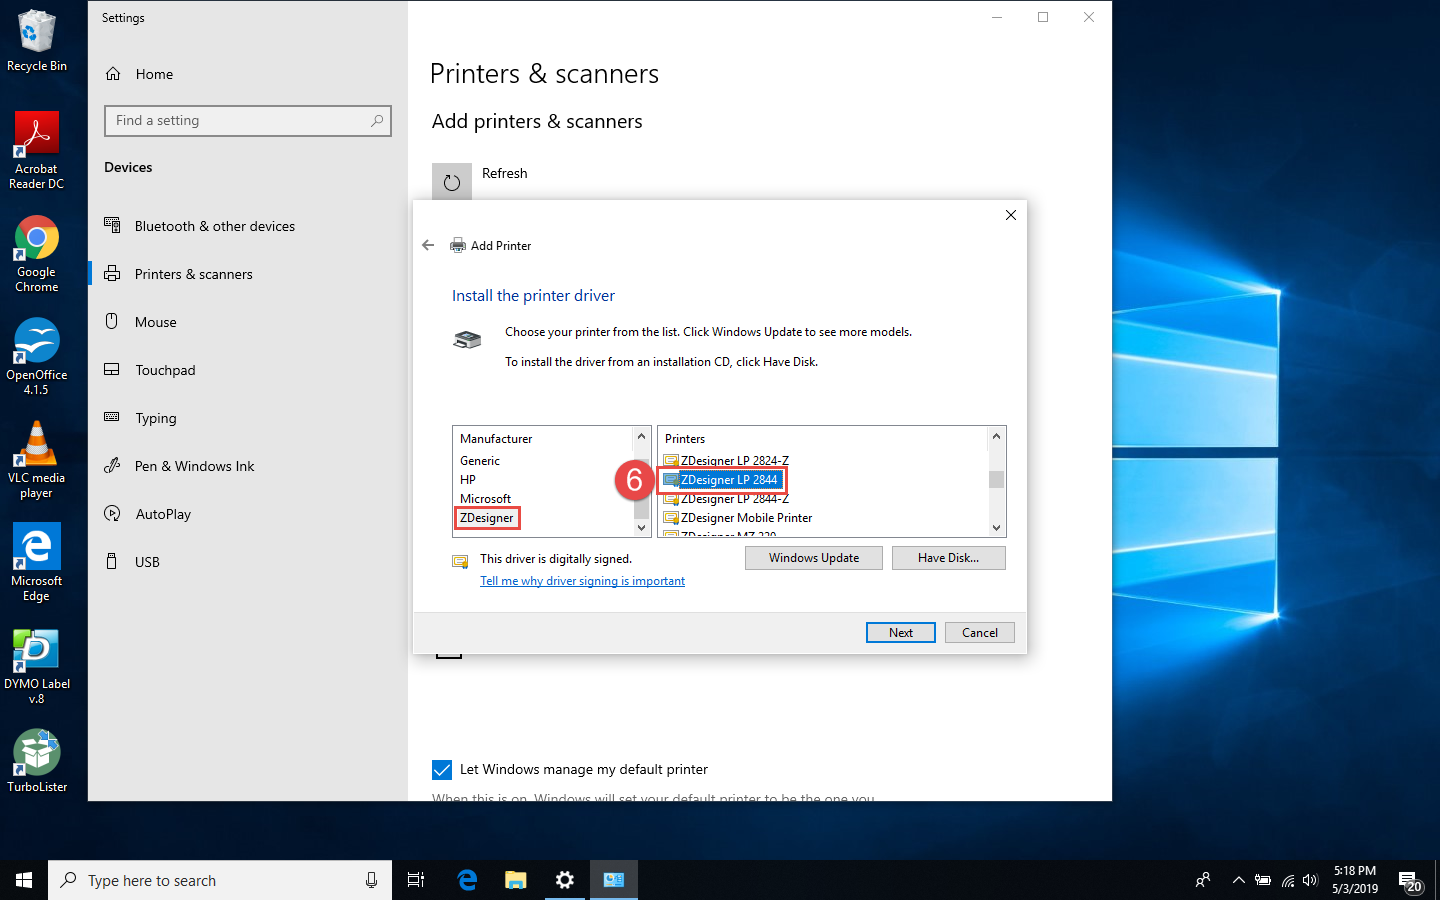
- Under Manufacturer, select “ZDesigner.” Under Printers, select “ZDesigner LP 2844.”
![]()
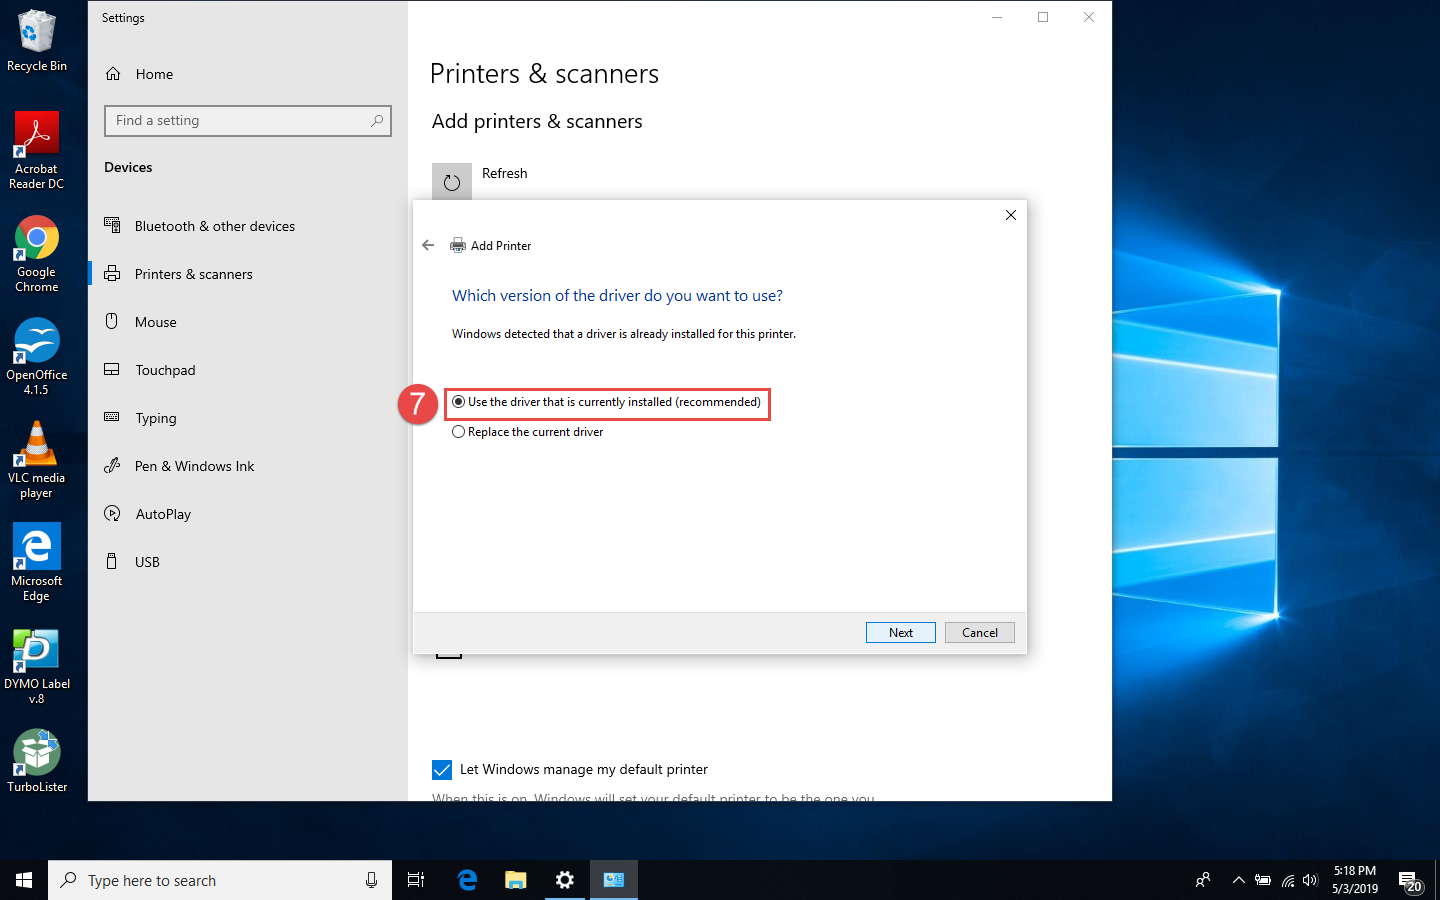
- Select “Use the driver that is already installed.” If you don’t see this option, then you can choose to install the driver for the printer.
![]()
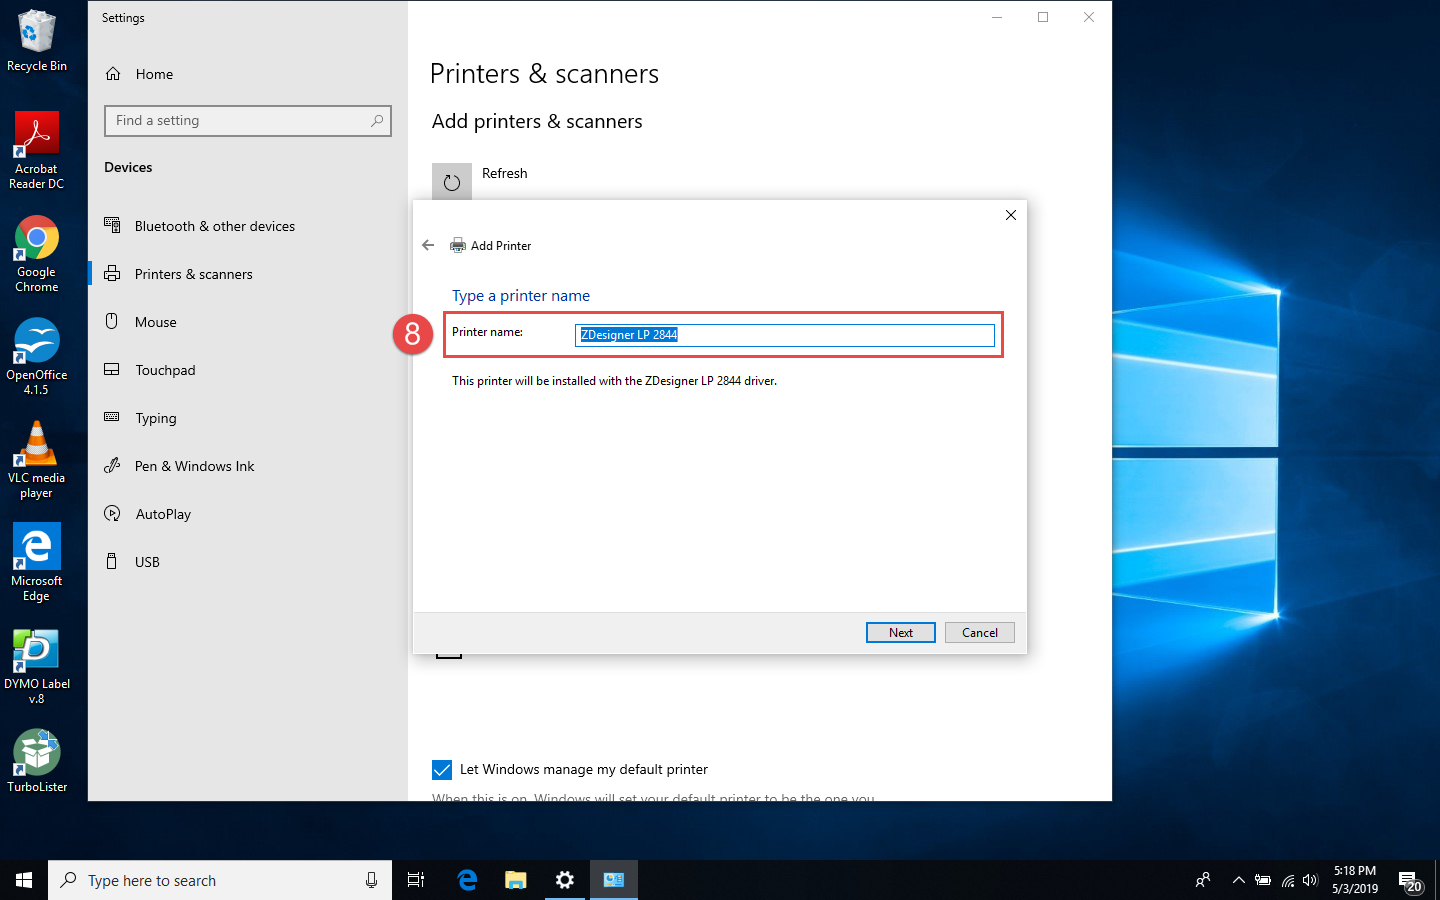
- Here, you can choose whatever name you’d like to use for the printer. “ZDesigner LP 2844” is the default name.
![]()
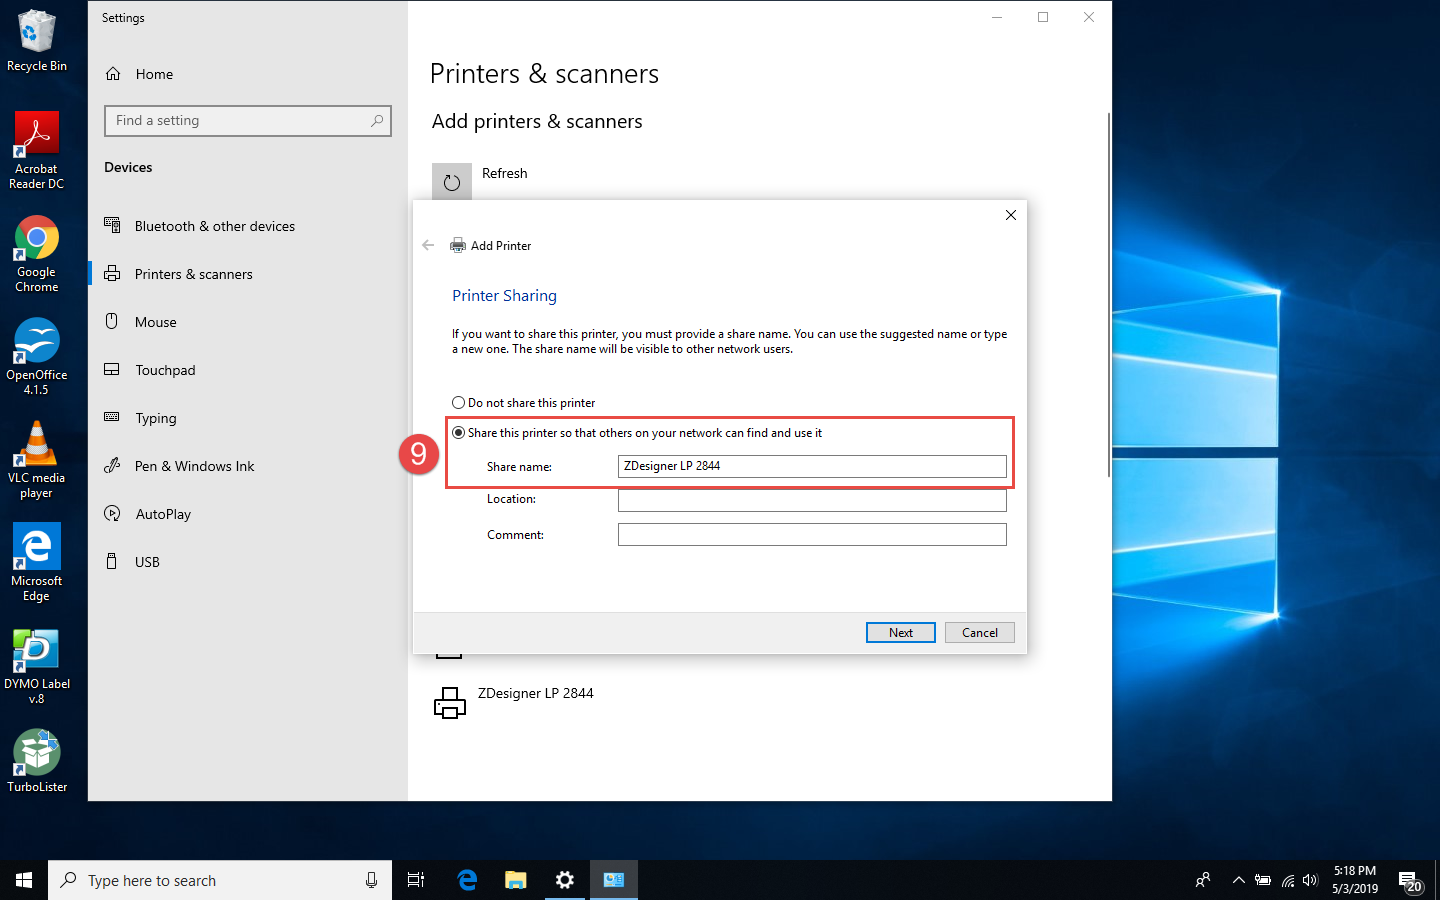
- (Optional) Choose to share the printer so that other computers can connect to and use it as well. You can select “Do not share this printer” if you don’t want other computers to connect to the printer.
![]()
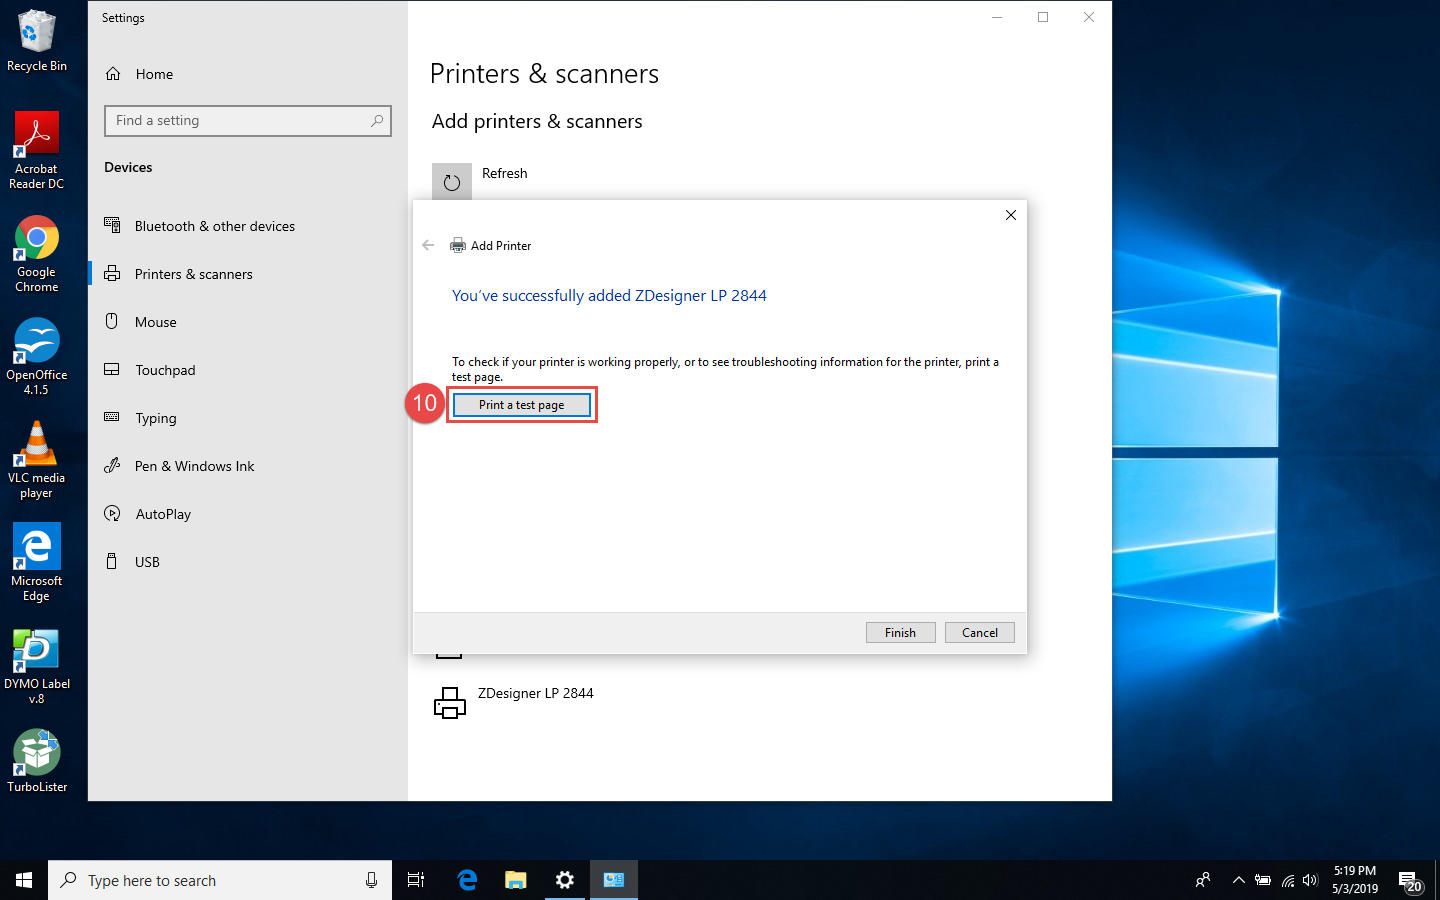
- Select “Print a test page” once you’ve completed all of these steps to ensure that the printer is properly connected.
![]()
- If you use a 4×6 label, go to printer preference and verify “Paper Format” is set to the inch (11) and Size is set to Width (4.00) and Height (6.00) (12) Click OK to finish.
![]()

Feedback
Copyright © 2024 ASellerTool, Inc.
—
Powered by 
Post your comment on this topic.